Egnyte provides secure cloud storage with built-in collaboration features, but it does not include native automation for pushing files to external SFTP or FTP servers. Many businesses need to automatically transfer files from Egnyte to partner systems, legacy applications, or backup servers that rely on SFTP or FTP protocols. While Egnyte supports inbound FTP and SFTP connections (allowing others to upload files to Egnyte), it cannot automatically send files to remote servers on a schedule.
Couchdrop solves this by connecting to your Egnyte storage and enabling automated, scheduled file transfers to any remote SFTP or FTP server. This allows you to maintain your existing Egnyte collaboration workflows while ensuring files reach external systems reliably. You can configure transfers to run hourly, daily, or at any interval that matches your business requirements, with built-in monitoring and notifications to track transfer success.
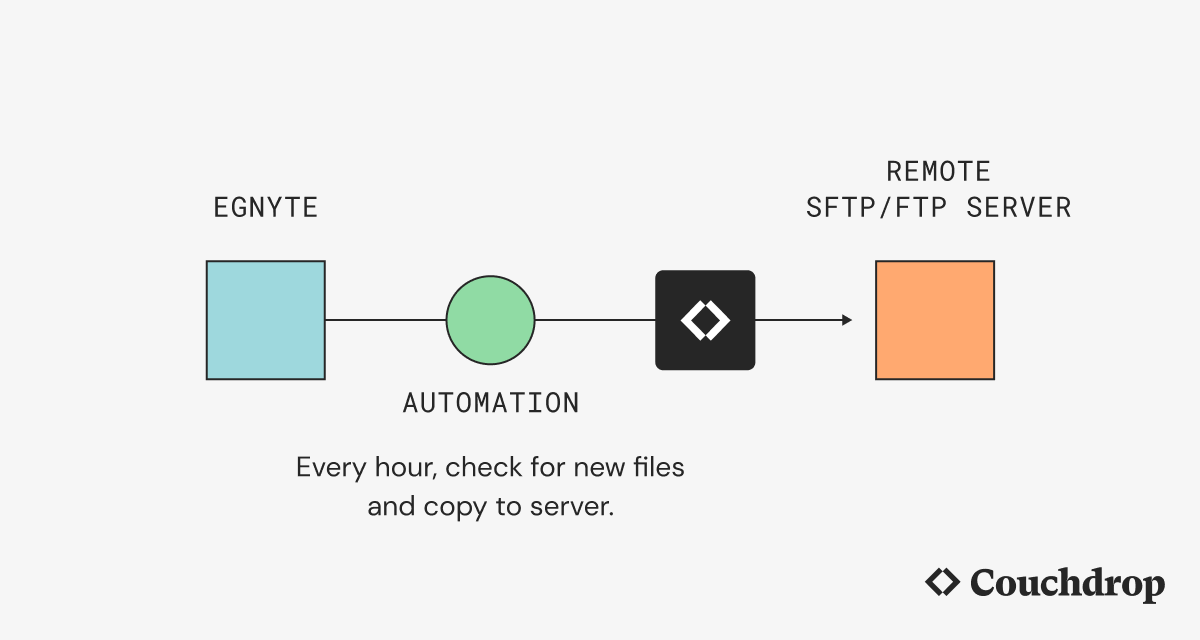
In this tutorial, you will connect both your Egnyte storage and a remote SFTP or FTP server to Couchdrop. You will then configure a Transfer Automation that polls your Egnyte folder on a schedule, identifies new or modified files, and transfers them to the remote server. When you complete this setup, files added to your designated Egnyte folder will automatically sync to your partner's SFTP or FTP server without manual intervention.
Prerequisites
To complete this tutorial, you will need:
- A Couchdrop account with Admin permissions. You can sign up for a free trial at couchdrop.io.
- An Egnyte account with access to the folder you want to sync. You will need your Egnyte domain name (for example, if you access Egnyte at
https://yourcompany.egnyte.com, your domain isyourcompany). - Credentials for a remote SFTP or FTP server including the hostname or IP address, port number, username, and either a password or SSH private key (for SFTP).
- Permission to create connections and automations in Couchdrop. If you do not see these options in your account, contact your Couchdrop administrator.
Step 1 — Connecting Egnyte Storage to Couchdrop
Before you can automate file transfers from Egnyte, you need to establish a connection between Couchdrop and your Egnyte account. This connection allows Couchdrop to access files in Egnyte and poll folders for changes.
Log in to your Couchdrop account and navigate to + Create → Connect to Storage from the main dashboard. In the connection type list, locate and select Egnyte.
In the search field, type Egnyte and select Egnyte from the list of available connections. Click Continue to proceed to the configuration screen.
Configure the following fields for your Egnyte connection:
- Name for this integration: Enter a descriptive name such as
Egnyte Production Storage. This name appears in Couchdrop's interface in the Admin panel under Connections. - Name for new Couchdrop folder: Enter a folder name such as
egnyte. This creates a virtual folder in Couchdrop's file system that represents your Egnyte storage. - Egnyte Domain: Enter your Egnyte domain name without the
.egnyte.comsuffix. For example, if you access Egnyte athttps://acme.egnyte.com, enteracme.
Click Authorize Egnyte. A popup window will open prompting you to authorize Couchdrop to access your Egnyte account. Log in with your Egnyte credentials and click Allow Access to grant permission.
After authorization completes, Couchdrop will attempt to verify the connection. Click Save and Test to verify that Couchdrop can communicate with Egnyte successfully. If the test succeeds, you will see a Connection online message.
The optional Choose a folder option allows you to select the root folder or a specific subfolder within Egnyte that you want to use as the starting point for your connection.
Click Add Integration to finish creating the connection.
You have now connected Egnyte to Couchdrop. When you navigate to the file browser in Couchdrop, you will see the virtual folder you created (for example, egnyte). Browsing this folder shows the contents of your Egnyte storage. In the next step, you will connect the destination SFTP or FTP server.
Step 2 — Connecting the Remote SFTP or FTP Server to Couchdrop
Now that Couchdrop can access your Egnyte files, you need to configure the destination where files will be transferred. This could be a partner's SFTP server, a legacy application's FTP server, or a backup system.
From the Connections page, click + Add Connection again. In the search field, type SFTP or FTP depending on your remote server's protocol.
For an SFTP server, select Connect to Partners/Providers and then choose SFTP Server from the list. (for an FTP server, select FTP Server instead. Click Continue to open the configuration screen)
Configure the following fields for your remote server connection:
- Name for this integration: Enter a name such as
Partner SFTP ServerorBackup FTP Server. - Name for new Couchdrop folder: Enter a folder name such as
partner-sftp. Files you transfer to this virtual folder in Couchdrop will be sent to the remote server. - SFTP Hostname: Enter the hostname or IP address of the remote server. This might look like
sftp.partner.comor203.0.113.45. - SFTP Port: Enter the port number. Most SFTP servers use port
22. Most FTP servers use port21. If your provider specified a different port, use that value. - SFTP Username: Enter the username for the user you want to access the remote server as.
For authentication, choose one of the following methods:
For password authentication:
- SFTP Password: Enter the password for the Username provided above.
For SSH key authentication:
- SFTP Private Key: Paste the key information or click the button to upload the key file directly.
- If your key has a passphrase, enter it in the SFTP Private Key Password field.
Choose if you want to enable the optional settings for Disable modern RSA algorithm and Enable SFTP Download Prefetch and then click Save and Test.
If the connection succeeds, you will see a Connection online
Select the destination folder on the remote server where you want files to arrive. For example, if your partner expects files in /incoming/, navigate to that folder and select it. You can also select the root directory if files should be placed at the top level.
Click Save Settings to create the connection.
You now have both connections configured in Couchdrop. Your Egnyte storage is accessible through the virtual folder you created in Step 1 (for example, /egnyte/), and your remote SFTP or FTP server is accessible through the virtual folder you created in this step (for example, /partner-sftp/). In the next step, you will create the automation that transfers files between these two locations.
Step 3 — Creating a Transfer Automation to Sync Files
With both storage connections configured, you can now create a Transfer Automation that periodically checks your Egnyte folder for new or modified files and transfers them to the remote server.
Navigate to Automations in the sidebar navigation and click + New Automation. This opens the automation builder interface. Each change you make, such as updating a name, trigger, or location, saves as a separate automation version. You can view and rollback to any version in the Versions tab under the automation name.
In the Configure Trigger section at the top of the builder, configure when the automation will run:
- How do you want this automation to trigger?: Select Scheduled from the dropdown menu.
- When would you like this to run?: Choose your desired schedule. For hourly transfers, select Hourly and select
00to run at the start of each hour. For daily transfers, select Daily and choose a time such as2:00 AM. For more frequent checks, select Frequency (minutes) and enter an interval such as15for every 15 minutes.
All schedules are evaluated in UTC timezone. If you need the automation to run at a specific time in your local timezone, convert that time to UTC before configuring the schedule.
Click Save to set the trigger configuration.
In the Configure Location section, specify which files to transfer from Egnyte:
- What would you like to transfer?: Select All Files in Folder if you want to transfer every file in a specific folder, or select All Files in Folder and Subfolders if you want to include subdirectories.
- Select a location: Click Select a location and navigate to your Egnyte connection. Choose the specific folder you want to monitor for files. For example, navigate to
/egnyte/Shared/Outbound/if that is where files are placed for transfer.
Click Continue to save the location configuration.
In the Configure Destination section, specify where files should be transferred:
- Select a location: Click Select a location and navigate to your remote SFTP or FTP connection. Choose the destination folder on the remote server. For example, navigate to
/partner-sftp/incoming/to place files in theincomingdirectory on the remote server.
Click Continue to save the destination configuration.
At this point, your automation will copy files from Egnyte to the remote server whenever the schedule triggers. As part of the automation, you can also perform file processing actions. For example, if you want to organize files by date in the destination, click the + button below the destination configuration and select Actions. Choose Rename File and use variables such as {YYYY}/{MM}/{DD}/{EXISTING_NAME} to create date-based folder structures.
Scroll back to the top of the automation builder. In the Automation Name field at the top (which may be called "Unamed Transfer - DATE"), replace the default name with something descriptive such as Sync Egnyte to Partner SFTP - Hourly.
Toggle the Transfer Automation Enabled switch to Enabled to activate the automation. The automation will now be activated and will run according to the schedule you configured.
On the next scheduled trigger, Couchdrop will check the Egnyte folder for files and transfer any files it finds to the remote SFTP or FTP server. In the next step, you will test the automation to verify it works correctly.
Step 4 — Testing the Automation
Rather than waiting for the next scheduled run, you can manually trigger the automation to verify it works as expected.
From the automation builder, click the Run/Trigger Workflow button at the top of the screen. This immediately executes the automation using the current configuration.
Couchdrop will check the source folder in Egnyte, identify any files present, and attempt to transfer them to the remote SFTP or FTP server. Navigate to the View Executions tab to see the execution history.
The execution log shows:
- Ran: The timestamp of when this automation instance ran.
- Status: Whether the transfer succeeded or failed. Successful transfers show a green indicator, while failures show a red indicator.
- Version: The version of the automation that ran. Recall that each change saves as a new version.
- Success Count: The number of files transferred during this execution.
- Failure Count: The number of files that failed to transfer.
Click on a specific execution to see detailed logs. The log shows each step of the process, including:
- Files discovered in the source folder
- Transfer progress for each file
- Destination paths where files were placed
- Any error or warning messages encountered
If the execution succeeded, verify that files arrived at the destination by connecting to your remote SFTP or FTP server using your normal client (such as FileZilla or WinSCP) and checking the destination folder. You should see the files from your Egnyte folder now present on the remote server.
If the execution failed, the detailed log will indicate the cause. Common issues include:
- Permission denied: The credentials for the remote server may be incorrect, or the user account may not have write access to the destination folder. Verify your username, password, and folder permissions with the remote server administrator.
- Connection timeout: The remote server may not be accessible from Couchdrop's IP addresses. If your remote server uses IP whitelisting, contact Couchdrop support to obtain the IP addresses to whitelist.
- Disk quota exceeded: The destination server may not have enough storage space. Check available disk space on the remote server.
To test ongoing synchronization, add a new file to your Egnyte folder using Egnyte's web interface or desktop application. Wait for the next scheduled trigger time, or manually trigger the automation again. Verify that the new file appears on the remote SFTP or FTP server after the automation runs.
You have now successfully configured and tested automated file synchronization from Egnyte to a remote SFTP or FTP server. Files added to the designated Egnyte folder will be automatically transferred according to your schedule without requiring manual intervention.
Next Steps
In this tutorial, you configured automated file transfers from Egnyte to a remote SFTP or FTP server using Couchdrop's Transfer Automations. You connected both your Egnyte storage and the remote server to Couchdrop, then created a scheduled automation that polls your Egnyte folder and transfers files to the destination server.
You can now automatically sync files from Egnyte to partner systems, backup servers, or legacy applications without manual file downloads and uploads. Your team can continue using Egnyte's collaboration features while ensuring files reach external systems reliably. The automation runs on your configured schedule and provides detailed execution logs for monitoring and troubleshooting.
To expand this workflow, you might want to:
- Configure conditional filtering to transfer only specific file types or files matching naming patterns. Learn more about conditional filtering in our guide on Transfer Automations.
- Add PGP encryption to files before transfer if your partner requires encrypted file delivery. See our tutorial on automated SFTP file transfers with PGP encryption and decryption.
- Set up email notifications to alert your team when transfers succeed or fail. Configure notifications in the automation builder by adding a notification action.
- Create multiple automations for different Egnyte folders, each with its own destination server and schedule.
- Build out additional Egnyte connections for different partners or users.
For more information about Couchdrop's automation capabilities, check out our documentation on building automations using the builder and supported automation actions.