NetSuite doesn't have a straightforward way to export files via SFTP. Compared to a simple cloud SFTP platform like Couchdrop, the process is much more involved and requires knowledge of NetSuite, scripting, and SFTP servers.
There are some applications in the SuiteApp Marketplace that can work as quick ways to establish SFTP connections. However, these are highly curated methods that are tied to a specific vendor.
In this guide, we will show you a vendor-agnostic method that enables you to export compatible records and files to any SFTP endpoint.
The NetSuite documentation includes the process for Setting up an SFTP Transfer using this method. This guide is intended to function as a companion piece to the documentation and will break down the steps in greater detail, including:
- The capabilities of NetSuite with the SFTP protocol,
- Configuring the NetSuite files to be exported,
- How to set up a credential management Suitelet,
- Configuring the
N/sftpsuitelet and sending exported data to an SFTP endpoint
NetSuite and the SFTP protocol
NetSuite does not function as an SFTP server; the platform can, however, be configured to push files via SFTP or to pull files from an SFTP endpoint. Both methods have limitations and restrictions, and files can only be transferred to and from specific NetSuite locations.
SFTP outbound push
SFTP is commonly used in NetSuite to push files from NetSuite into a server or SFTP endpoint. The files can then be retrieved and distributed to users, departments, partners, external parties, and downstream processes.
It is important to note that not all files can be pushed using SFTP; since NetSuite requires using the N/sftp suitelet, only files that this suitelet can access can be transferred.
SFTP pull capabilities
As mentioned above, NetSuite can only pull files into File Cabinet—not accept an inbound push. Once the files are in File Cabinet, they need to be processed in order to use the data in NetSuite.
Processing the files allows them to be used across NetSuite via further tasks such as CSV import, processing with SuiteScript, or used for custom records.
Configuring an SFTP export in NetSuite
Before sending data, you must select and configure the data to be sent. While it is possible to configure Saved Searches and Reports to be transferred via SFTP, File Cabinet is the most straightforward, so will be the focus of this particular guide.
For this example, we will go step-by-step on how to configure and export a single file, then explain how you can adjust the process for dynamic file names and entire folders.
This process requires creating JavaScript files, importing the script files into NetSuite, and editing the script files within NetSuite, which will be detailed below.
Part 1 - Create the file export SuiteScript
File Cabinet exports are the simplest files to export, as they are already saved in NetSuite in a file format. Simply find the files you want to export (In Documents > Files > File Cabinet), then use SuiteScript N/file to load the file.
-
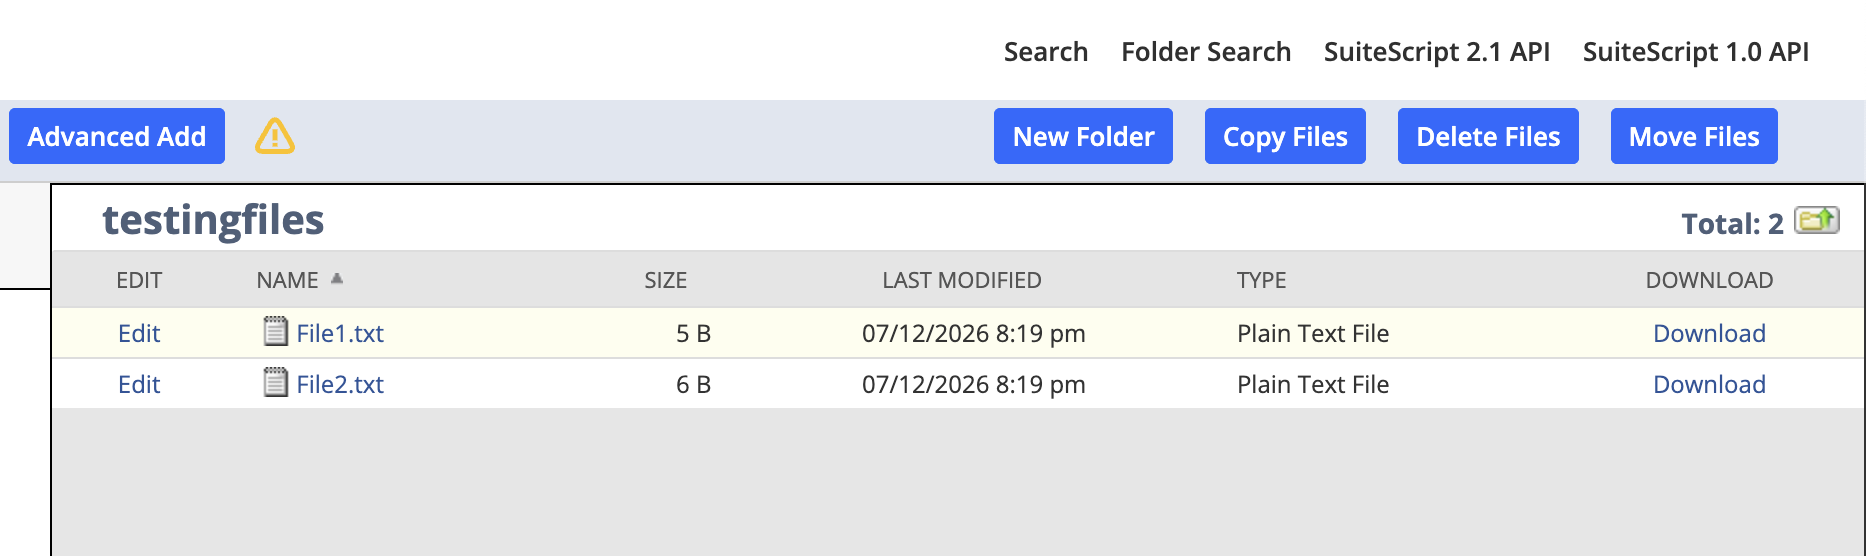
Start by going to the File Cabinet.

- Navigate the folders until you find the file you want to send. In this example, it is called File1.txt.
-
To load the file, you need the file's internal ID. You can find this in the Internal ID field when choosing to Edit or View a file. Another way to find the Internal ID is by copying from the end of the URL when editing a file. Look for the string id=[IDnumber].

Alternatively, NetSuite allows loading a file by relative path. This can be the more straightforward approach if the file will always be in the same path.
- Now, you need to create a JavaScript file. One way to do this is by adding the script in Notepad and then saving the file as a .js file.
The script must call both theN/fileandN/sftpSuiteScript Modules. This requires a specific format in the script itself, as well as placing the file in a specific location.
Below is an example of setting up the SuiteScript file. Components in blue will need to be updated to your specific file and folders. The component in red is temporary and will be updated in a later step. TheN/logmodule is used to log and display information./**
* @NApiVersion 2.1
* @NScriptType ScheduledScript
*/
define(['N/file', 'N/sftp', 'N/log'], (file, sftp, log) => {
const execute = () => {
const loadedFile = file.load({
id: 'filepath/filename.extension'
});
log.audit({
title: 'File loaded',
details: {
name: loadedFile.name,
size: loadedFile.size,
fileType: loadedFile.fileType
}
});
const connection = sftp.createConnection({
username: 'SFTP USERNAME',
passwordGuid: 'TO BE GENERATED',
url: 'demo.couchdrop.io',
port: 22,
directory: '/',
hostKey: 'SERVER HOSTKEY'
});
connection.upload({
directory: 'DIRECTORY PATH',
filename: loadedFile.name,
file: loadedFile,
replaceExisting: true
});
log.audit({
title: 'SFTP upload complete',
details: loadedFile.name + ' uploaded success'
});
};
return { execute };
});
Replace the directory path with/to use the SFTP user's root folder.
For the hostkey field, you need the public key for the SFTP server that you are connecting to, which NetSuite requires thehostKeyto establish a connection. The only truly secure way to ensure this is from a server administrator, but if you are unable to do this, you can use a tool to look it up, including directly from the CLI.
For the CLI method, open up a terminal and enter this code:> ssh-keyscan [serverhostname]It will generate a response that includesssh-rsaand a long string of characters. This string is the hostkey. Paste it into the hostKey field in the file.
See What is an SSH key and how are they used for SFTP for more details on SSH keys. - Next, upload the JavaScript file into SuiteScript. Scripts will not work when placed in other folders. You can find the SuiteScript folder in
Documents > SuiteScripts.
Within the root SuiteScript directory, you can create subfolders and place script files in the subfolders and they will still function.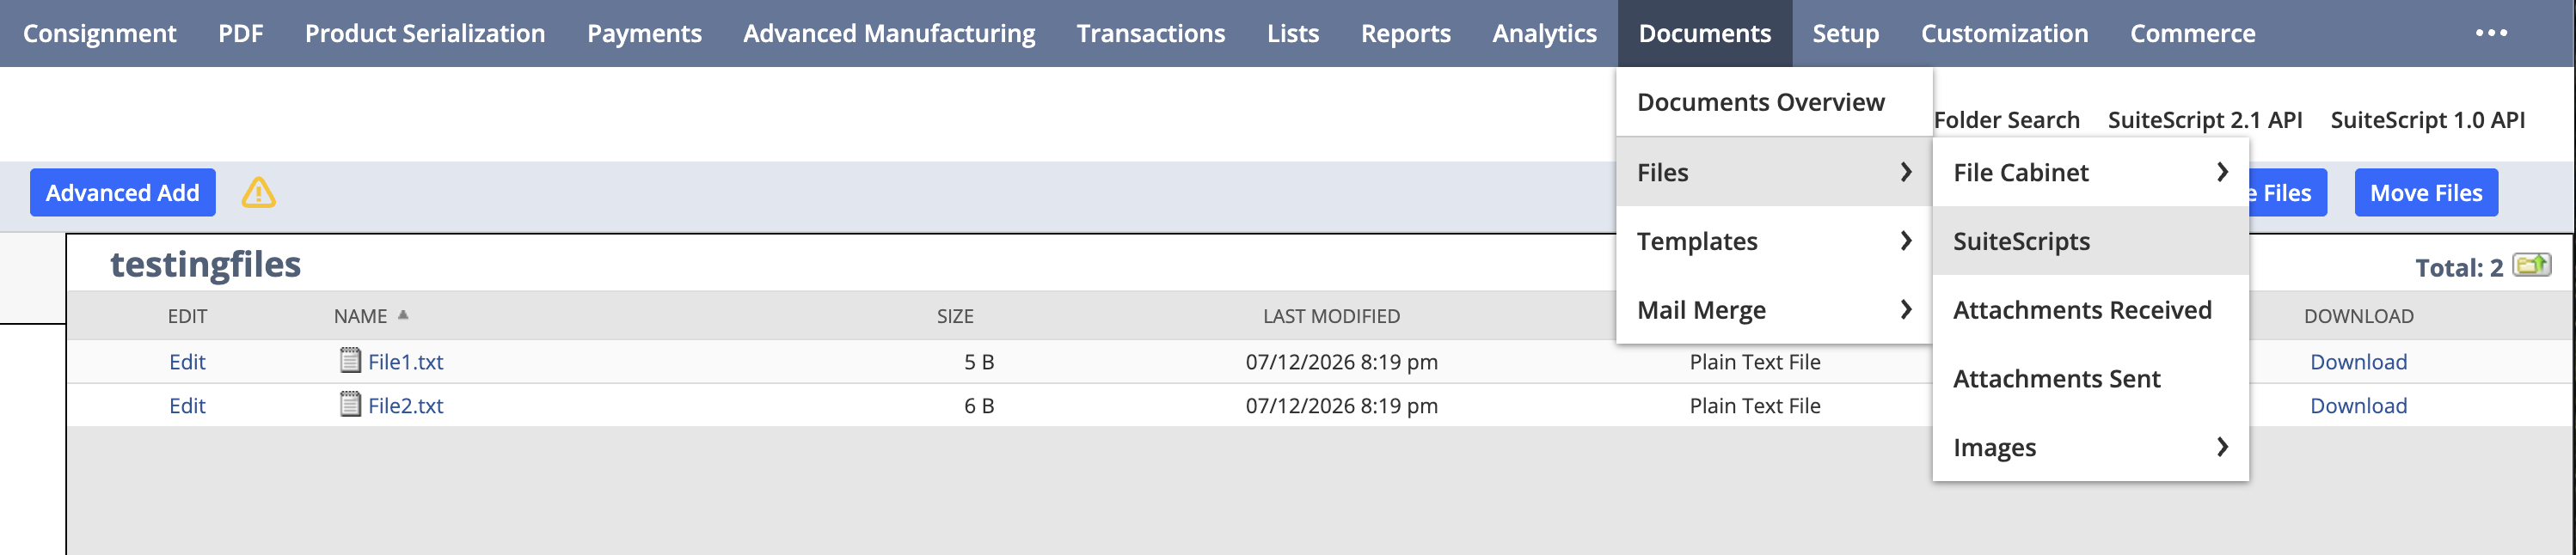 In your target directory, click the Add File button and select the JavaScript file you created in Step 4.
 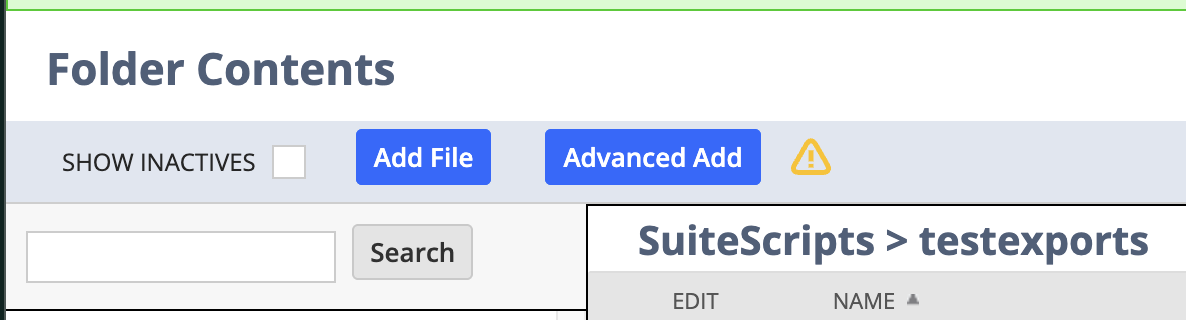 Record the name and location of this file, as you will need to edit it later.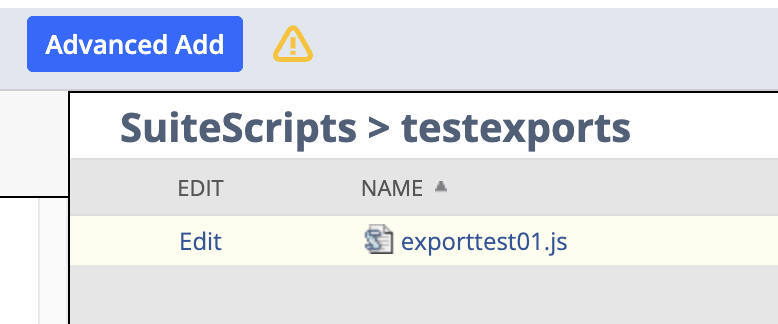
- The next step is to configure the script to run. Go to
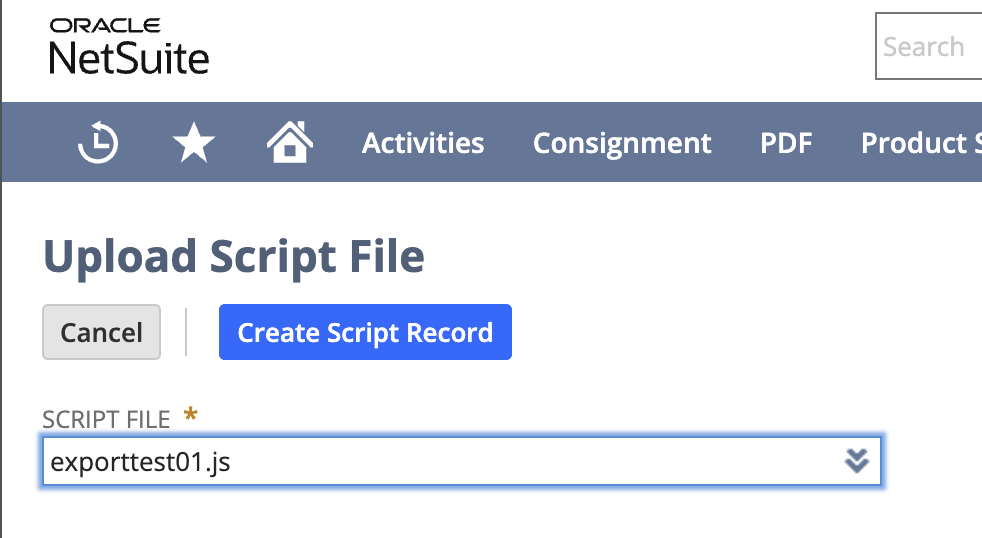
Customization > Scripting > Scriptsto start the process.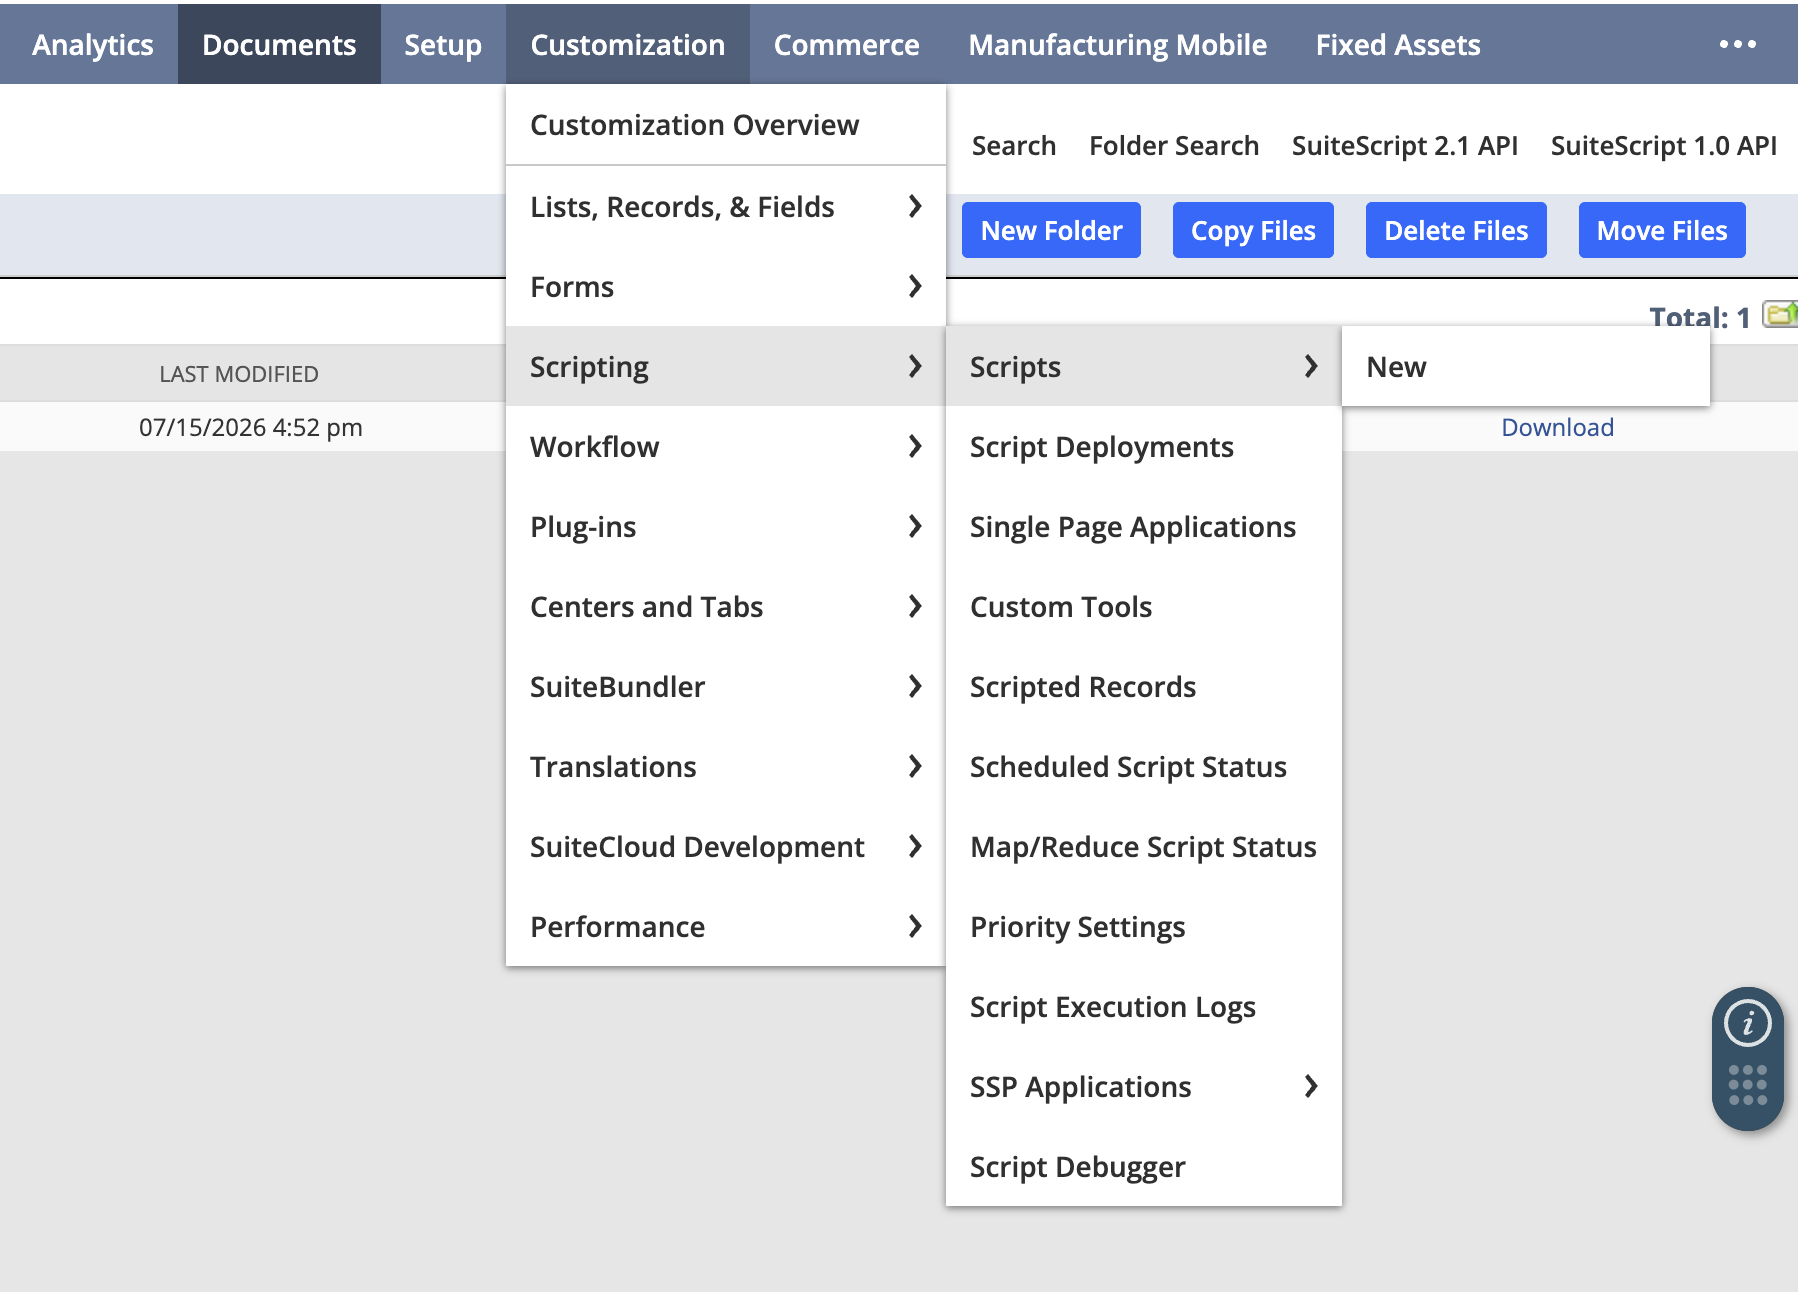 Choose a subfolder if you wish, then click the New Script button. NetSuite will ask you to select a Script file. It only searches the SuiteScript folder, which is why it was crucial to upload the file there. Select the file with your script and Create Script Record.
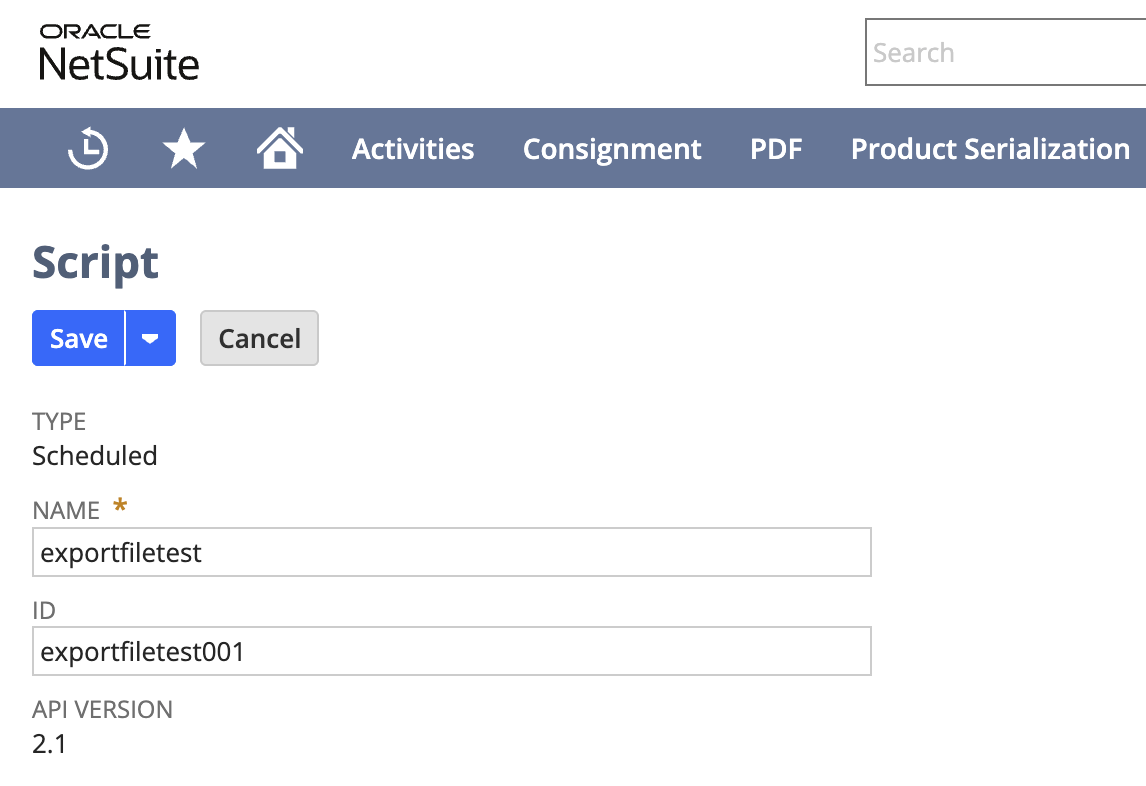
  You will be taken to the Script configuration screen after pressing the button. Give the script a name and an ID. Copy this ID, as you will need it for the next part. Click Save.
Part 2 - Create a Credentials Suitelet
Because NetSuite doesn't allow using passwords within the script, you must generate a passwordGuid in another script. What this will do is use the SFTP user credentials to create a secure authentication token that NetSuite will use to authenticate your user with the server and allow the files to be exported.
This is where the Script ID you created comes to play; NetSuite forces you to specify which scripts the authentication token is valid for, and will give a failure if another script attempts to use the token.
Again, you will need to create a JavaScript file and then add it to the SuiteScript folder. This time, the script needs to pass along the credentials of the SFTP user and will generate the authentication token that you add to your original script file.
Below is an example of JavaScript code to create the credentials Suitelet. Replace the components in blue with your own details.
/** * @NApiVersion 2.1 * @NScriptType Suitelet */define(['N/ui/serverWidget', 'N/log'], (serverWidget, log) => { const onRequest = (context) => { if (context.request.method === 'GET') { const form = serverWidget.createForm({ title: 'credstest' }); form.addCredentialField({ id: 'custpage_sftp_password', label: 'SFTP Password', restrictToDomains: 'YOUR SFTP HOSTNAME', restrictToScriptIds: 'YOUR SCRIPT ID FROM ABOVE' }); form.addSubmitButton({ label: 'Create Password GUID' }); context.response.writePage(form); } if (context.request.method === 'POST') { const passwordGuid = context.request.parameters.custpage_sftp_password; log.audit({ title: 'Password GUID created', details: passwordGuid }); context.response.write( 'Password GUID created. Copy this value from the script execution log: ' + passwordGuid ); } }; return { onRequest };});
Save the file as a .js file and return to NetSuite, and follow the steps below to generate the authentication token:
- Go to SuiteScript
Documents > SuiteScripts. In your target directory, click the Add File button and select the JavaScript file. Select the credentials JavaScript file generated above.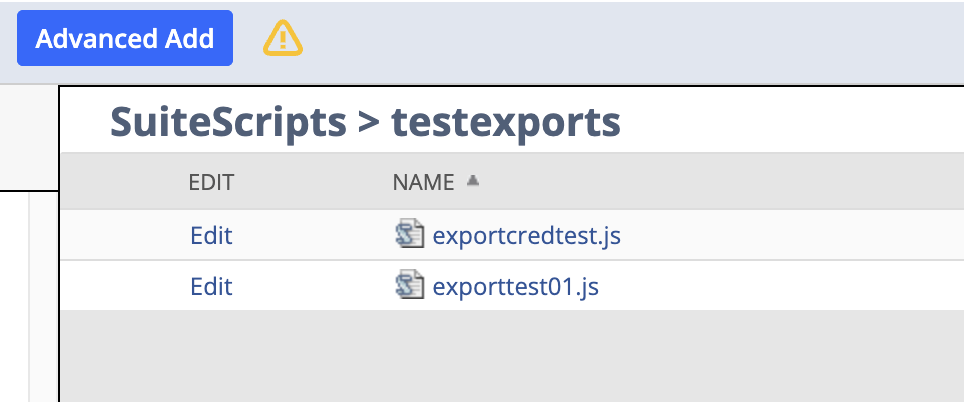
- Go to
Customization > Scripting > Scripts > New. Select the script file and Create Script Record. Provide a name and ID for the script. Select the dropdown in Save and choose Save and Deploy.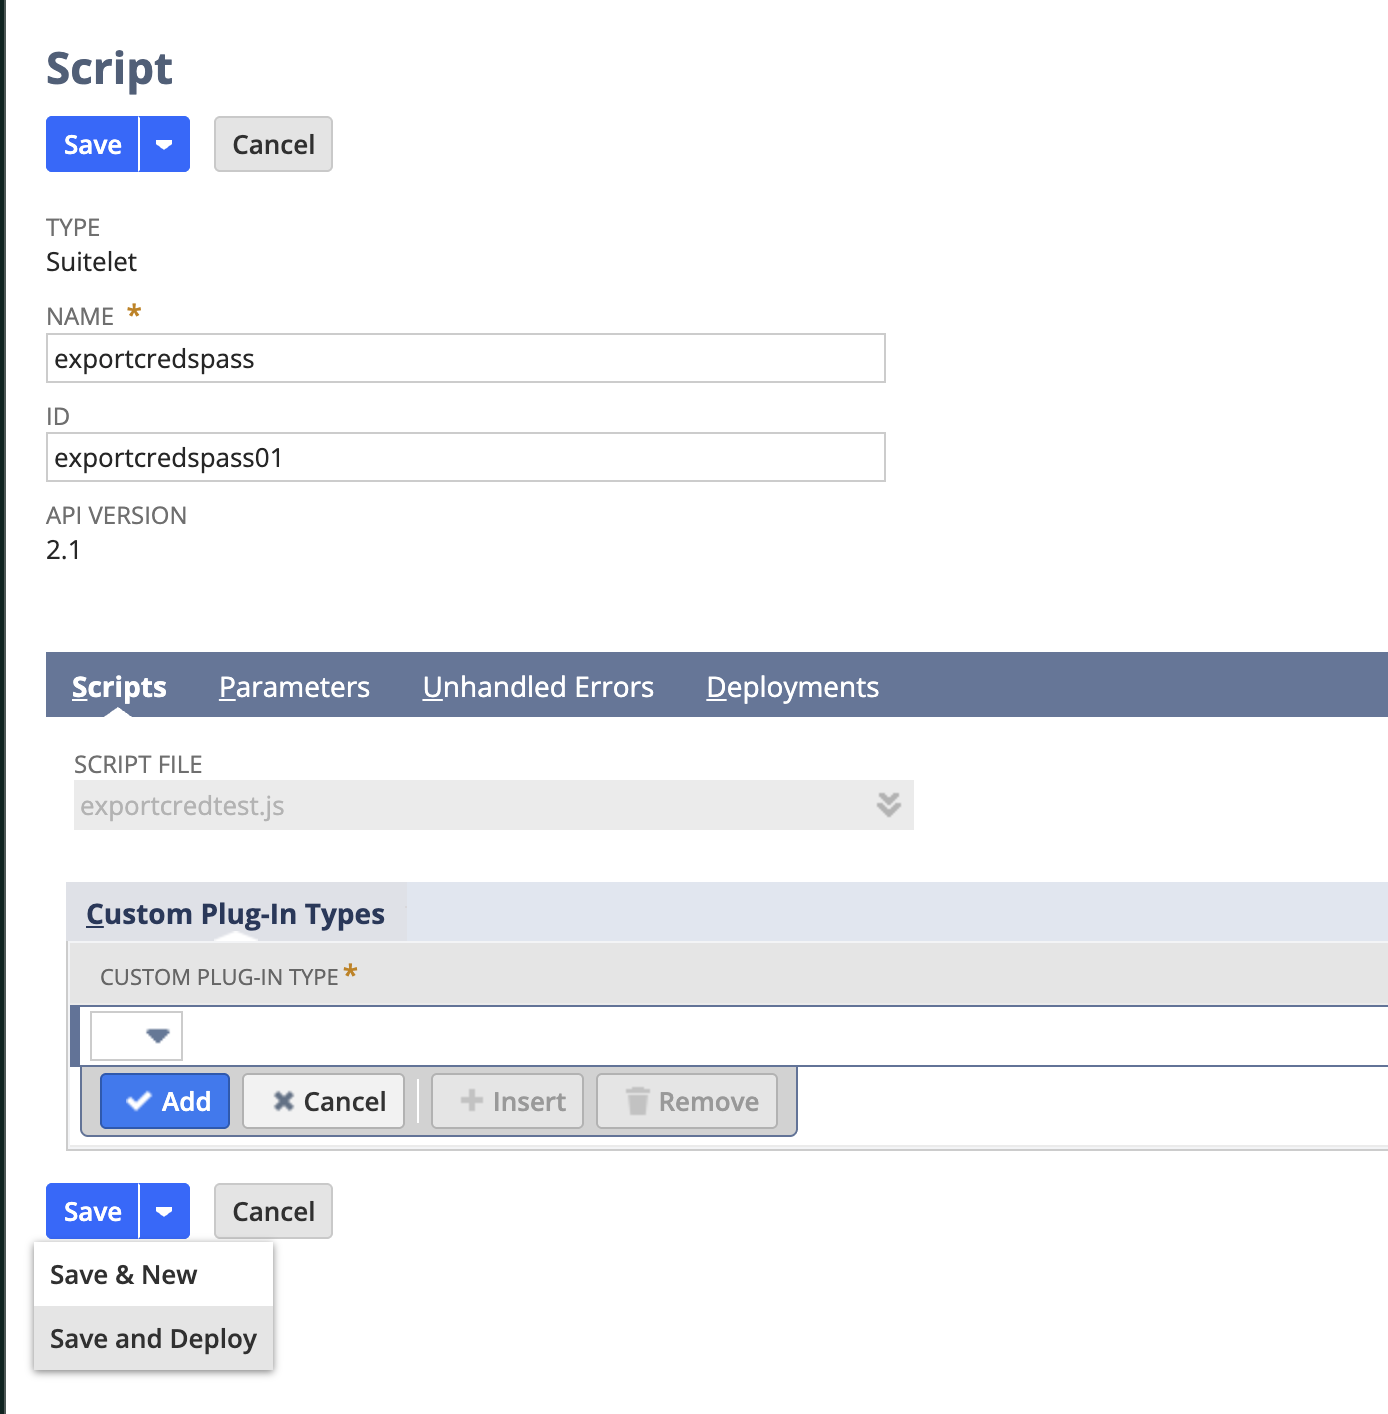
- The script is now in the deployment stage and the deployment menu will open (You can also get to this menu at
Customization > Scripting > Script Deployments). For testing purposes, set Status to "Testing" and Log Level to "Debug". Set the schedule ("Single Event" is good for testing).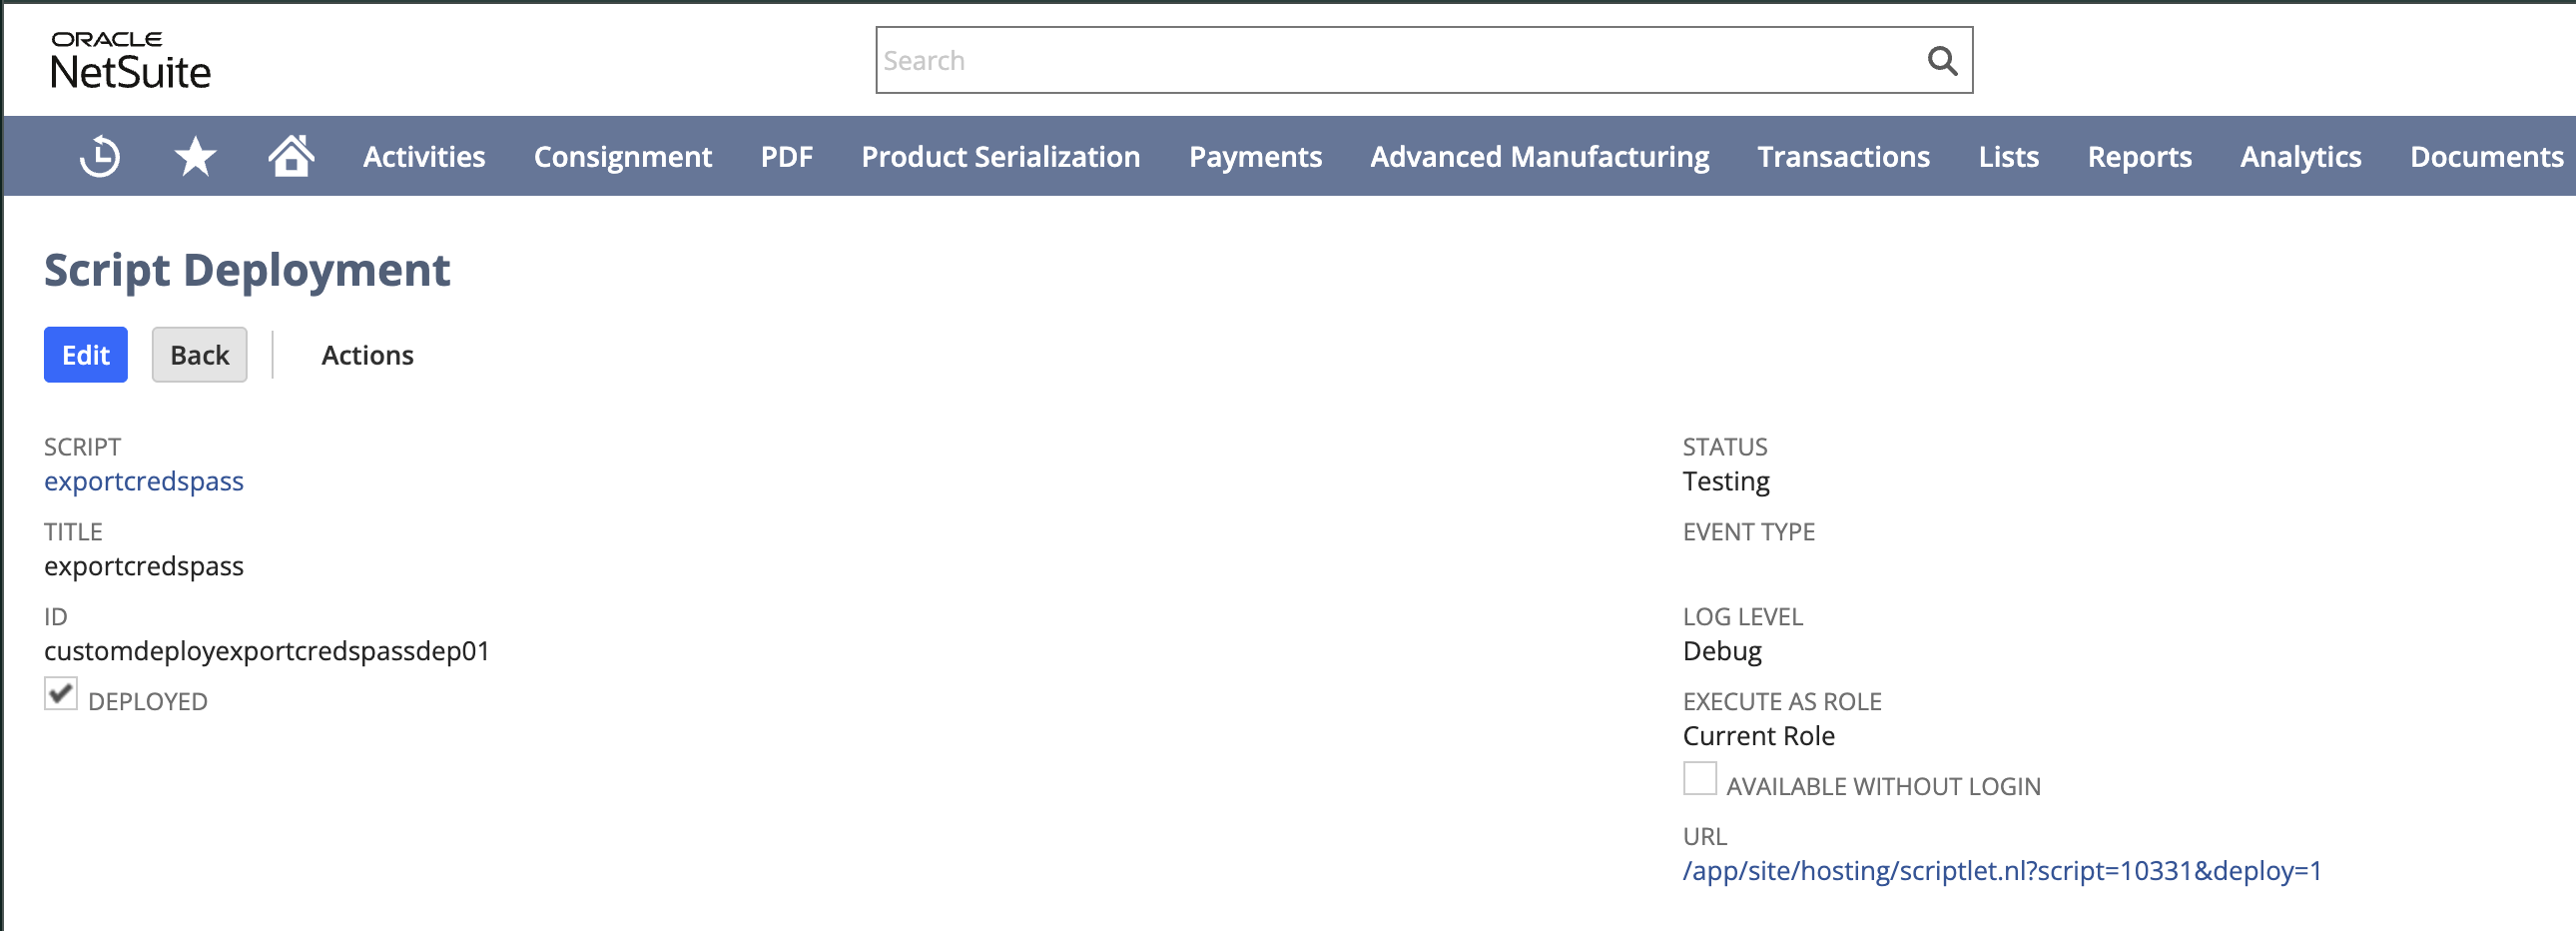 Because this is a credentials script, NetSuite also requires it to be applied to specific users. Scroll down to Audience and select who can use the script (We recommend selecting your User for testing purposes). Click Save.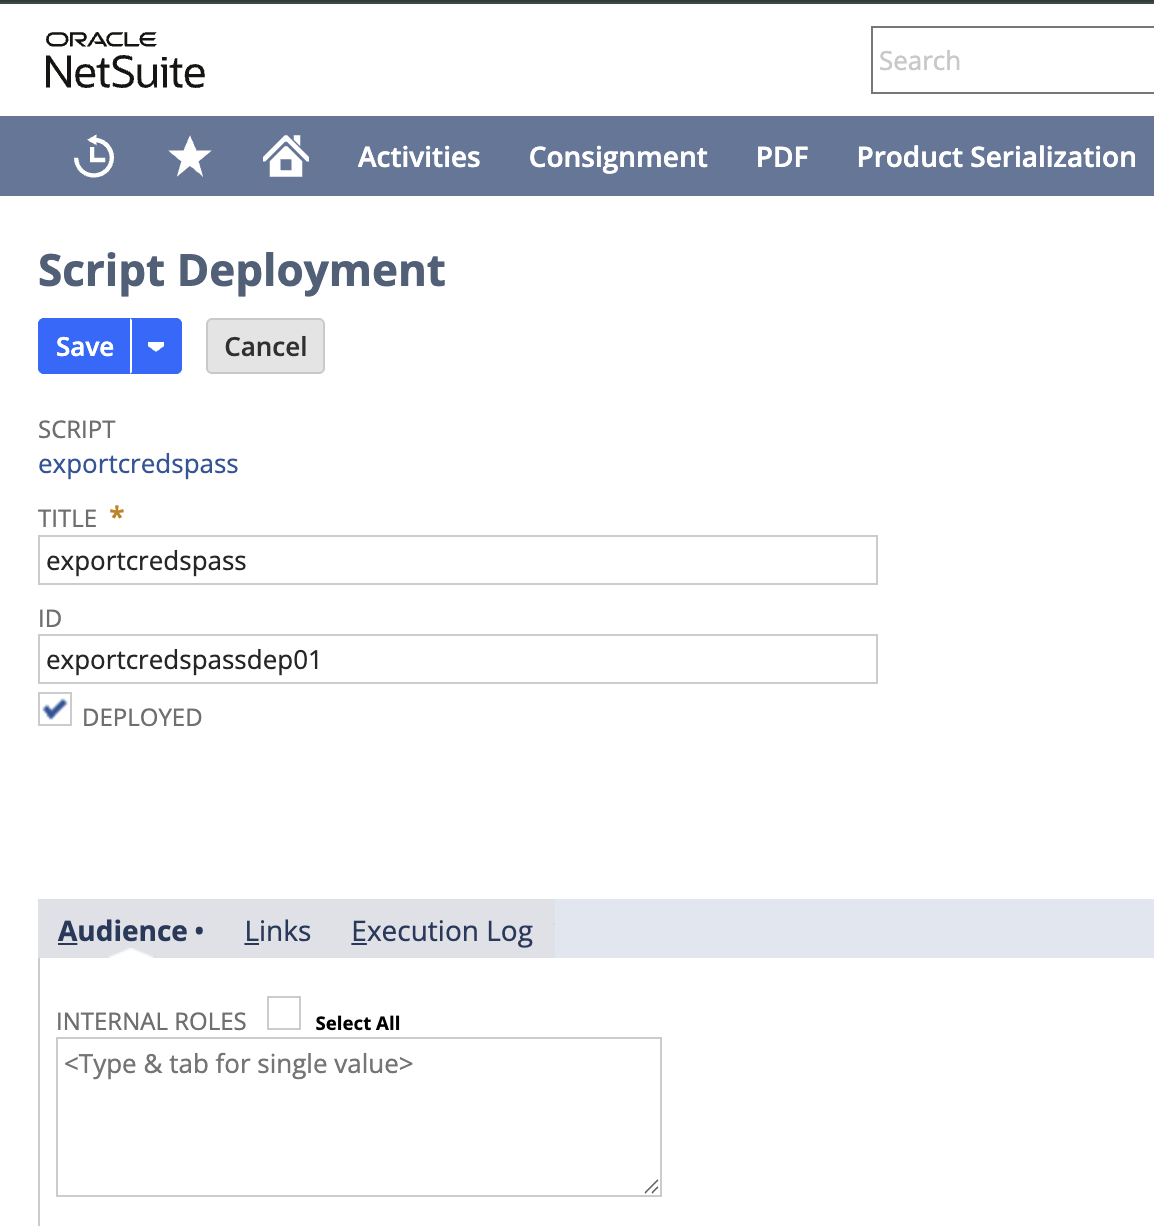
- A deployment summary screen will show. Click the URL field. This will take you to a form (created from the JavaScript file) prompting you to enter the password for your SFTP user. After doing this, Create Password GUID.
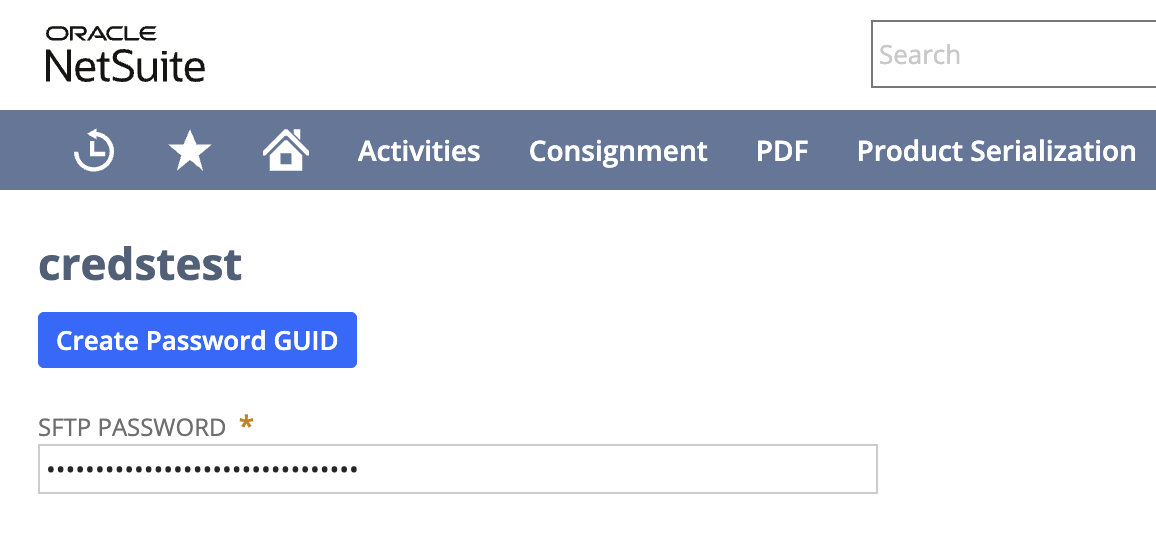
- You will be taken to a screen showing the generated Password GUID. Copy this token.

- Go to your original SFTP script file at
Customization > Scripting > Scripts > [YourScriptName]. Scroll toScripts > SCRIPT FILEand click Edit. This will edit the details of the existing JavaScript file the script is using. You must edit the existing file instead of creating a new one because the credentials are limited to this file's ID.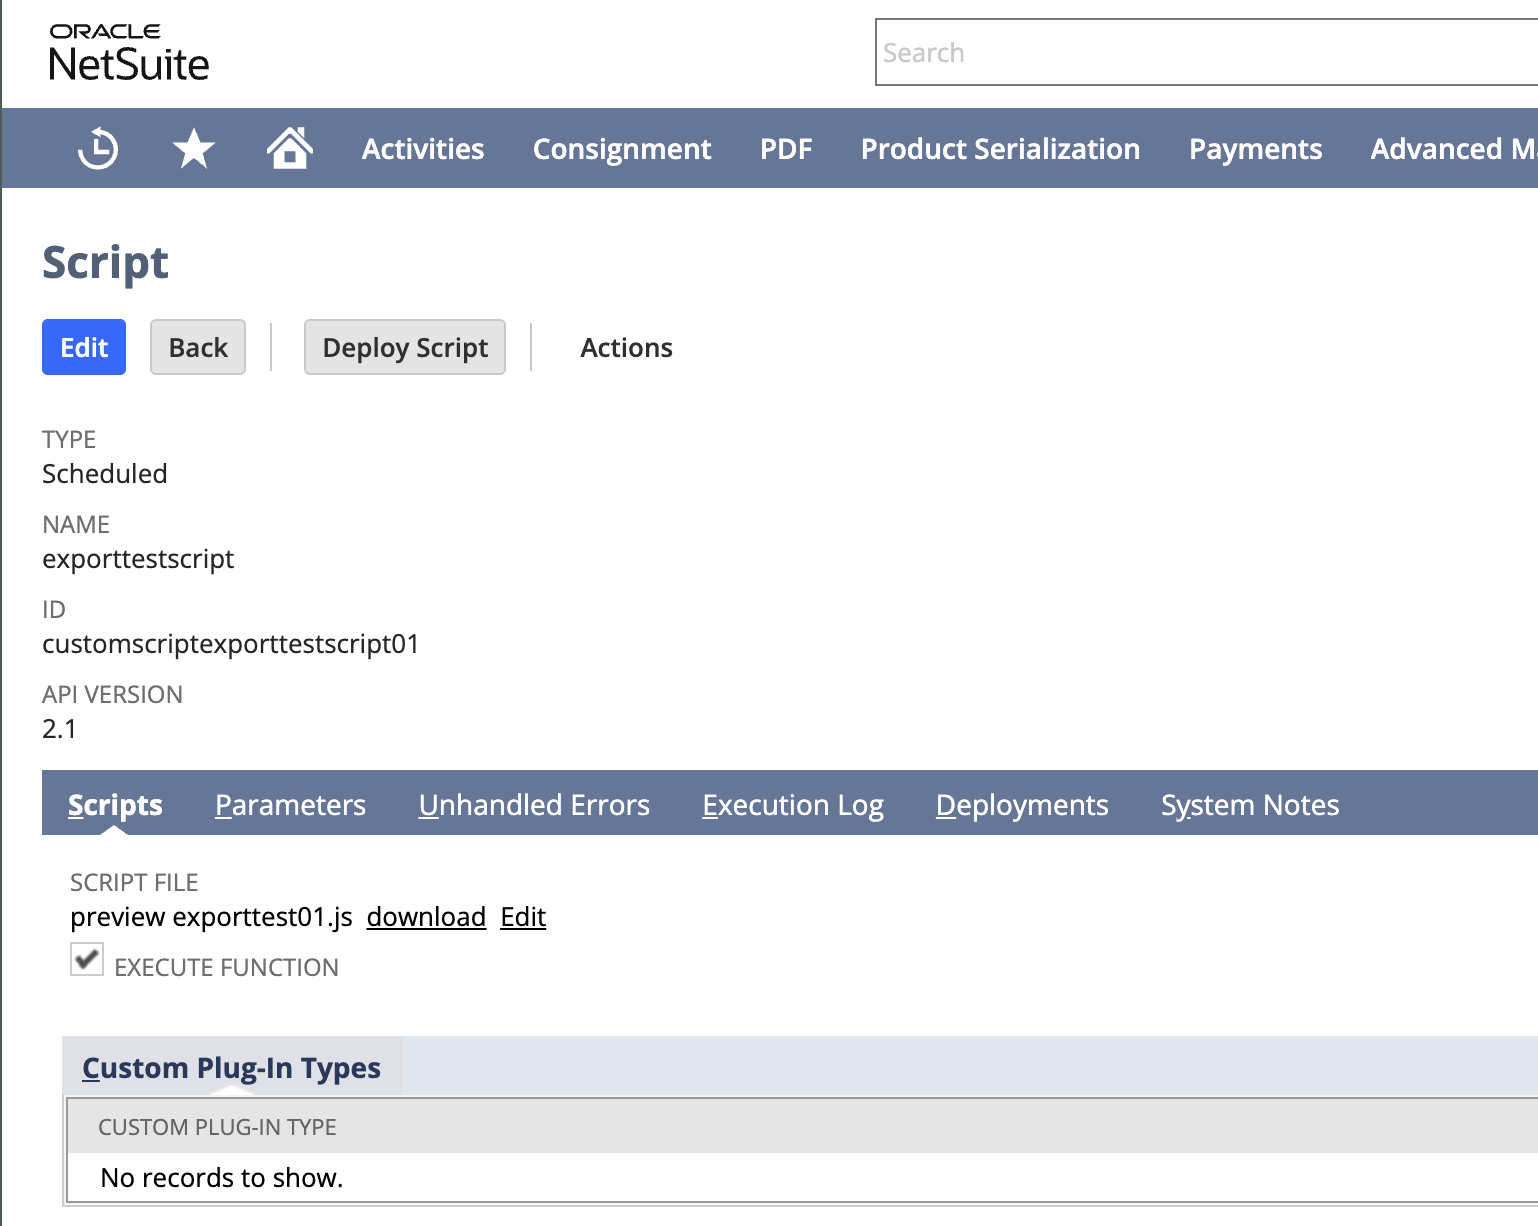
- A document editor will open. Find the field for
passwordGuidand paste the token that you copied in Step 5. Click Save.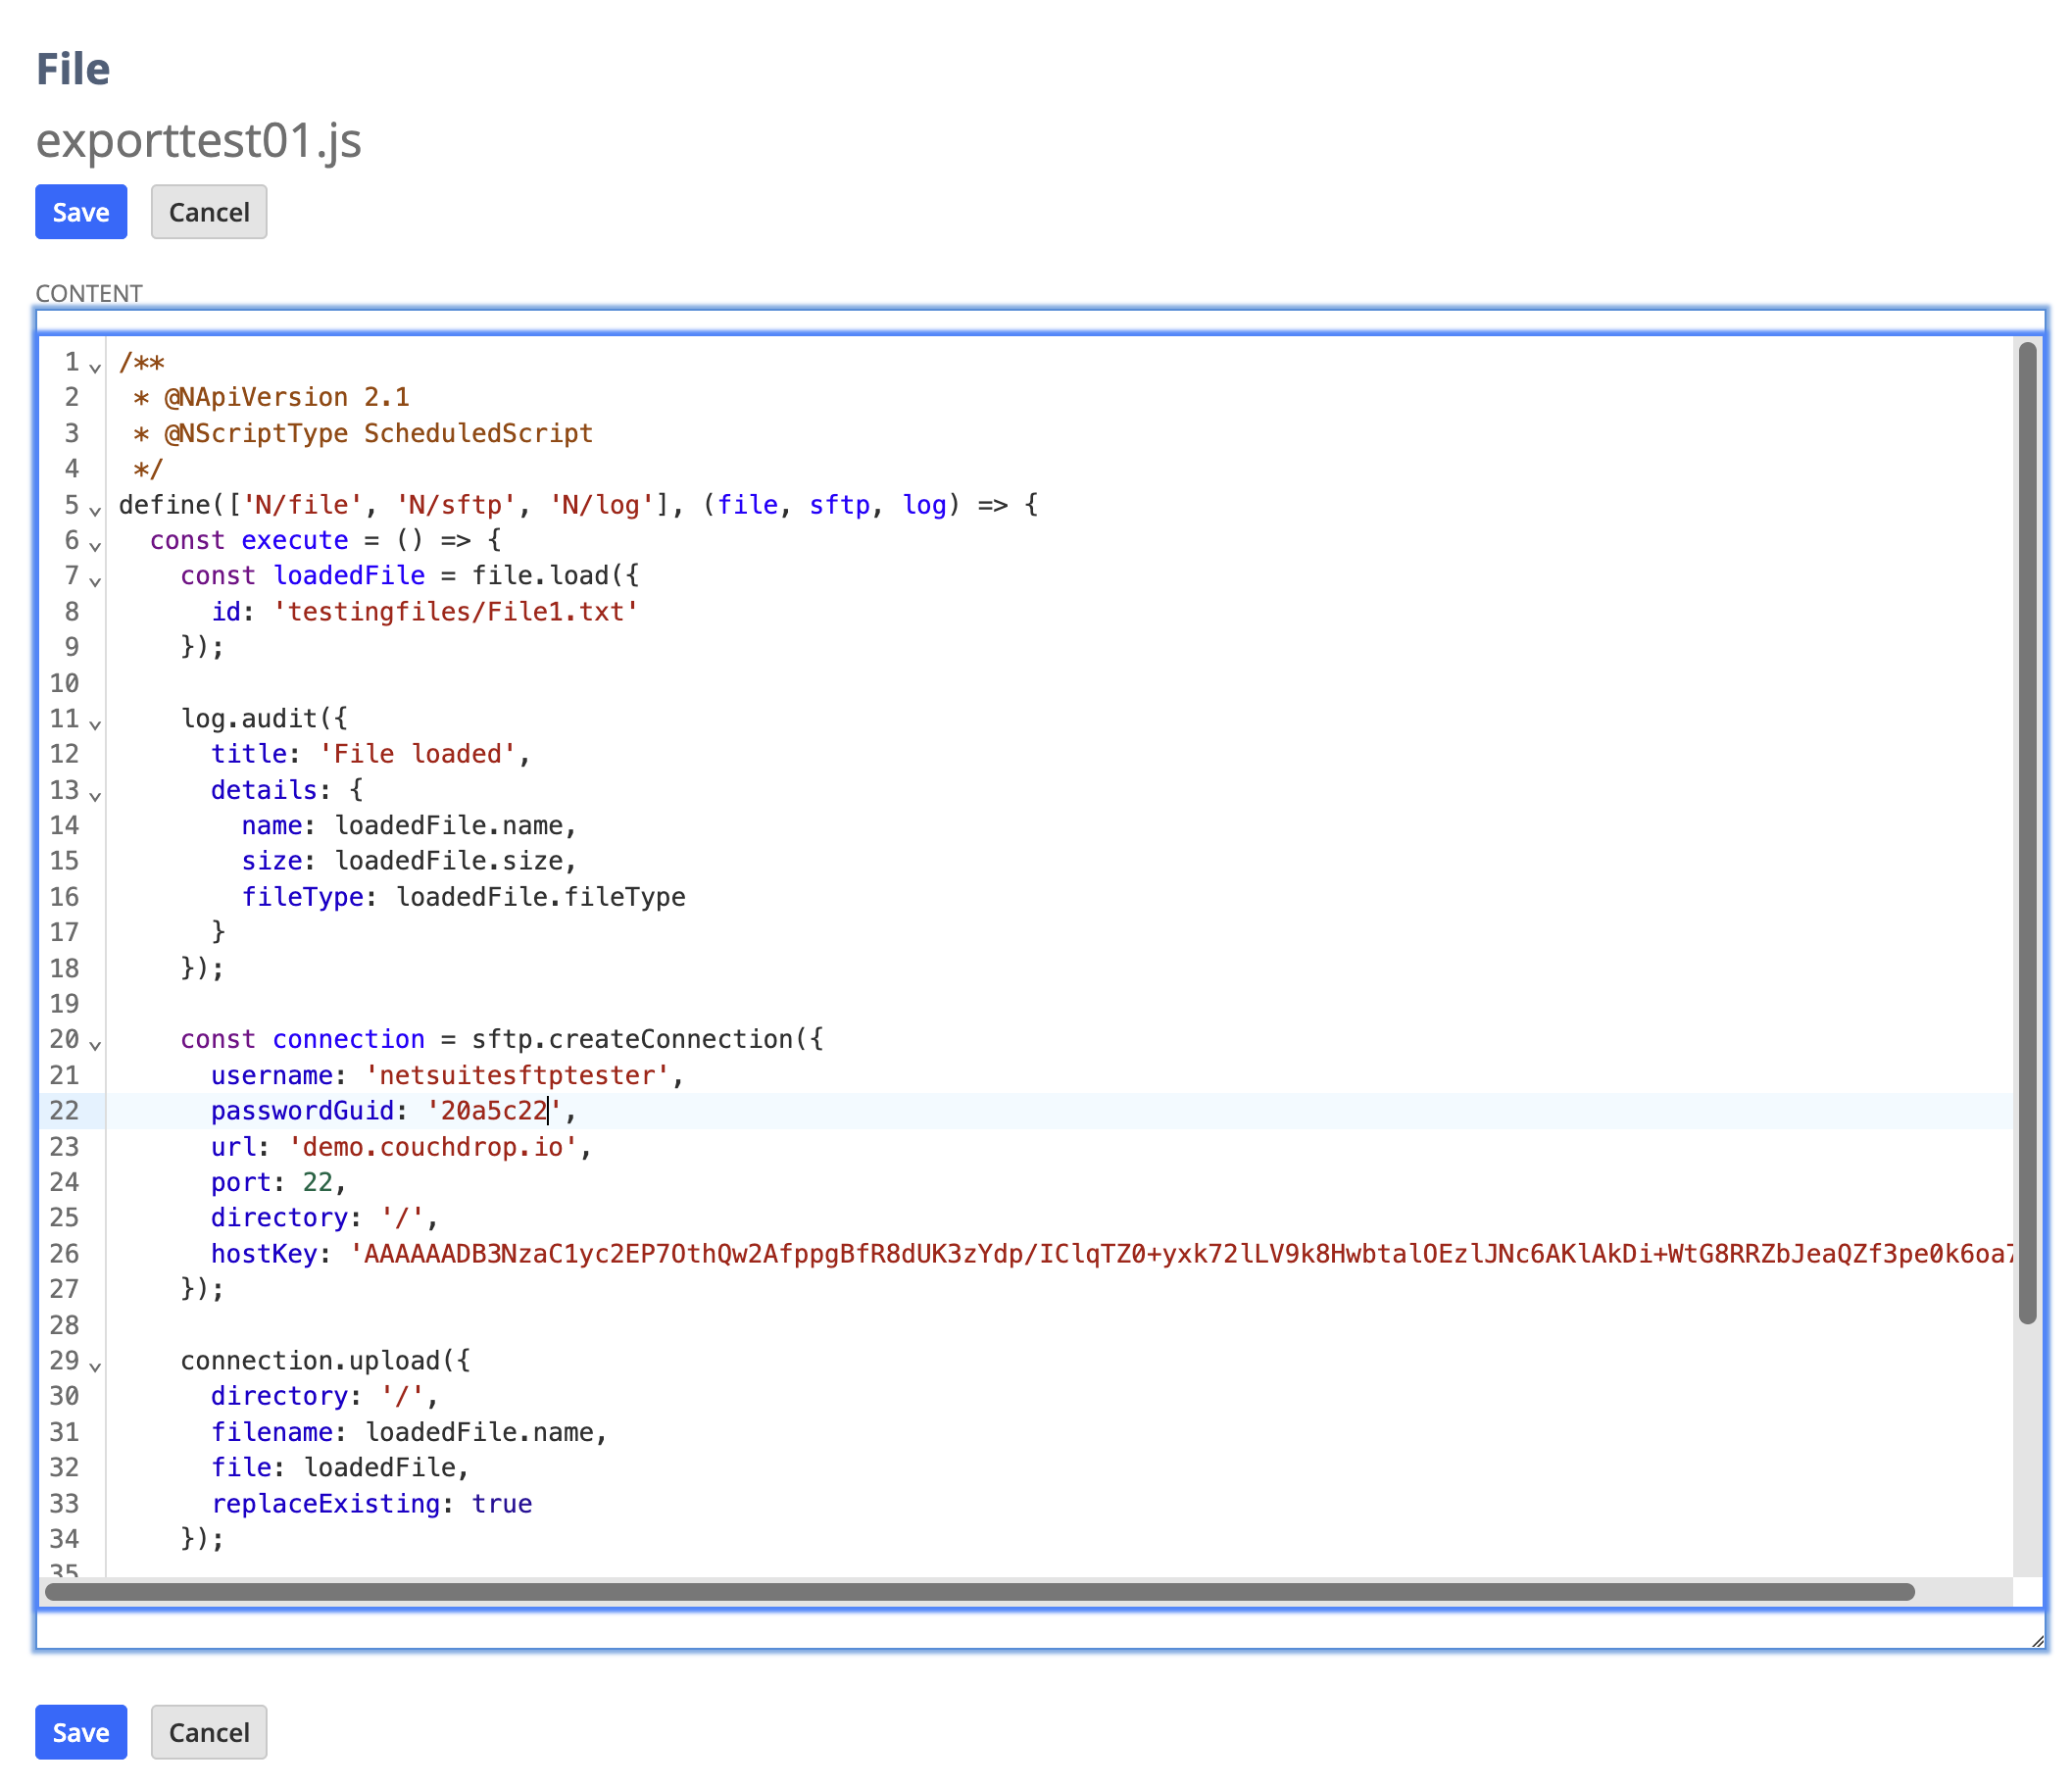 The SFTP script now has everything it needs to run successfully, and the final part is running and testing that it can transfer files.
Part 3- Create the file export SuiteScript
Now that the script has the required credentials, you can deploy it to export the file via SFTP. This is similar to how you deployed the Credentials Suitelet.
- If you are still on the Script edit screen, you can start here. If not, go to
Customization > Scripting > Scripts > [YourScriptName]. Click the Dropdown by Save and choose "Save and Deploy".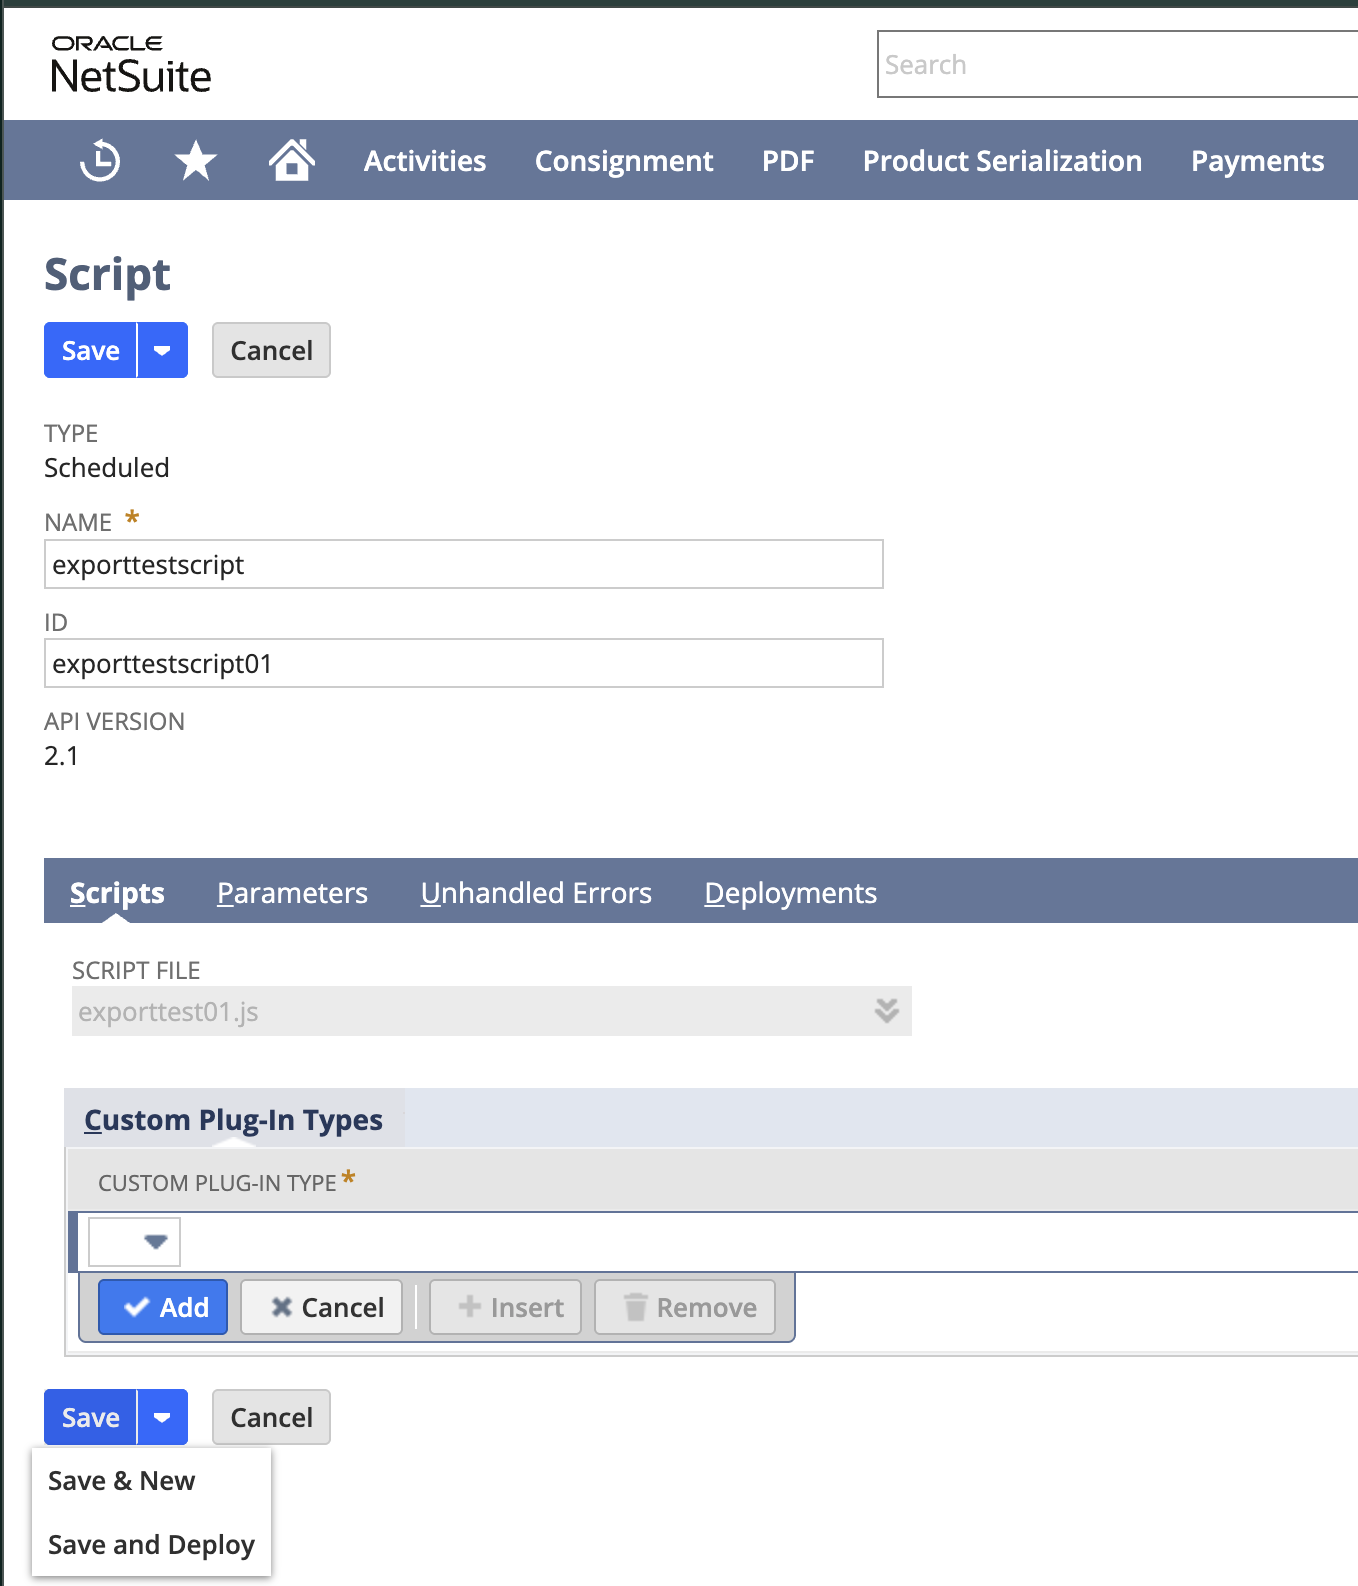
- The deployment screen will open. For testing purposes, set Status to "Testing" and Log Level to "Debug". Set the schedule to "Single Event". Click Save.
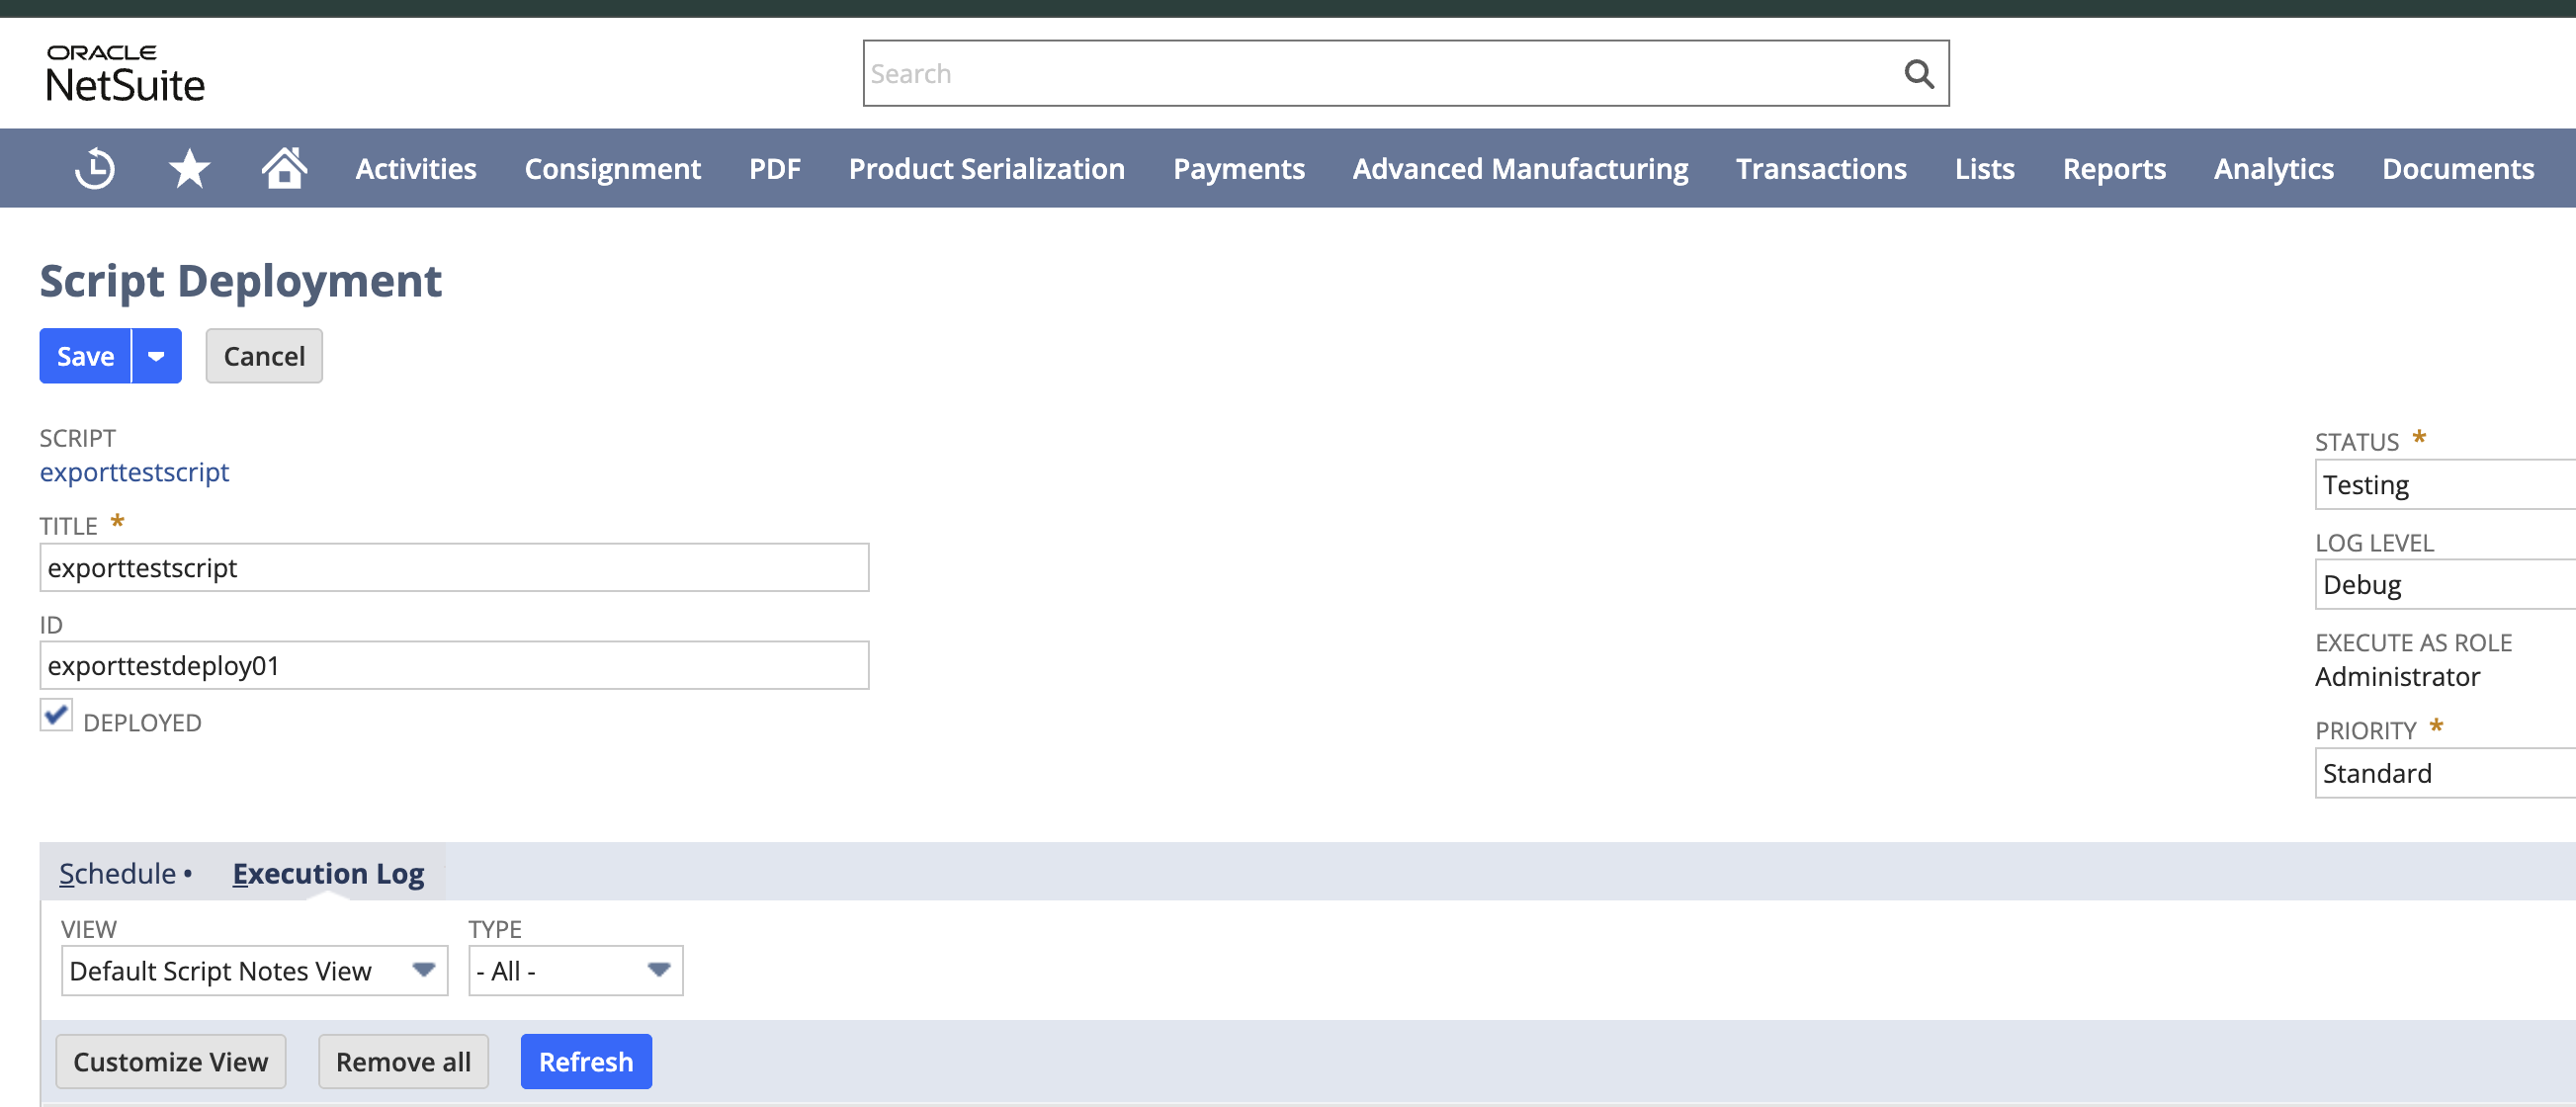
- A deployment summary screen will show. Check that everything seems correct and click Edit.
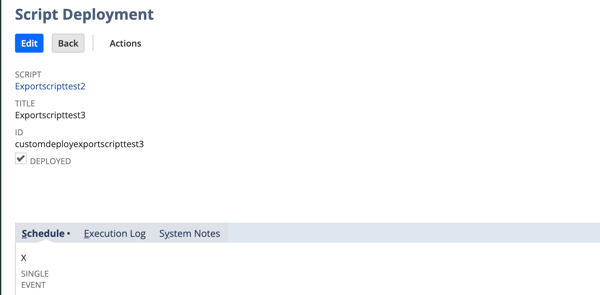 On the Editing screen, click the dropdown by Save and choose"Save and Execute".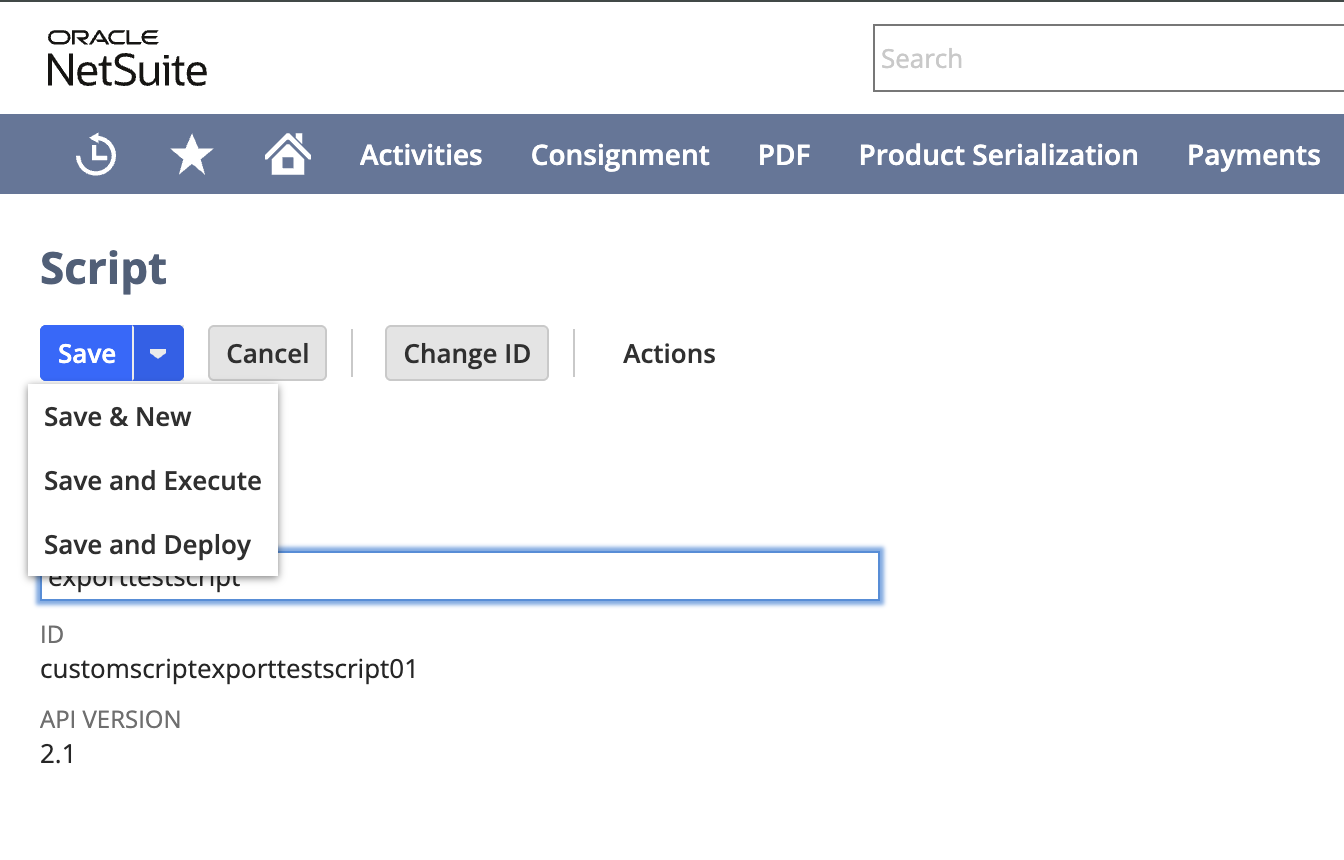
- Check that the script ran successfully. You can do that in the Execution Log of the Script record itself, or go to
Customization > Scripting >Scheduled Script Statusand check there. If you can't find your script, select the name in the Script dropdown.
The log should tell you if the script ran and if it was successful.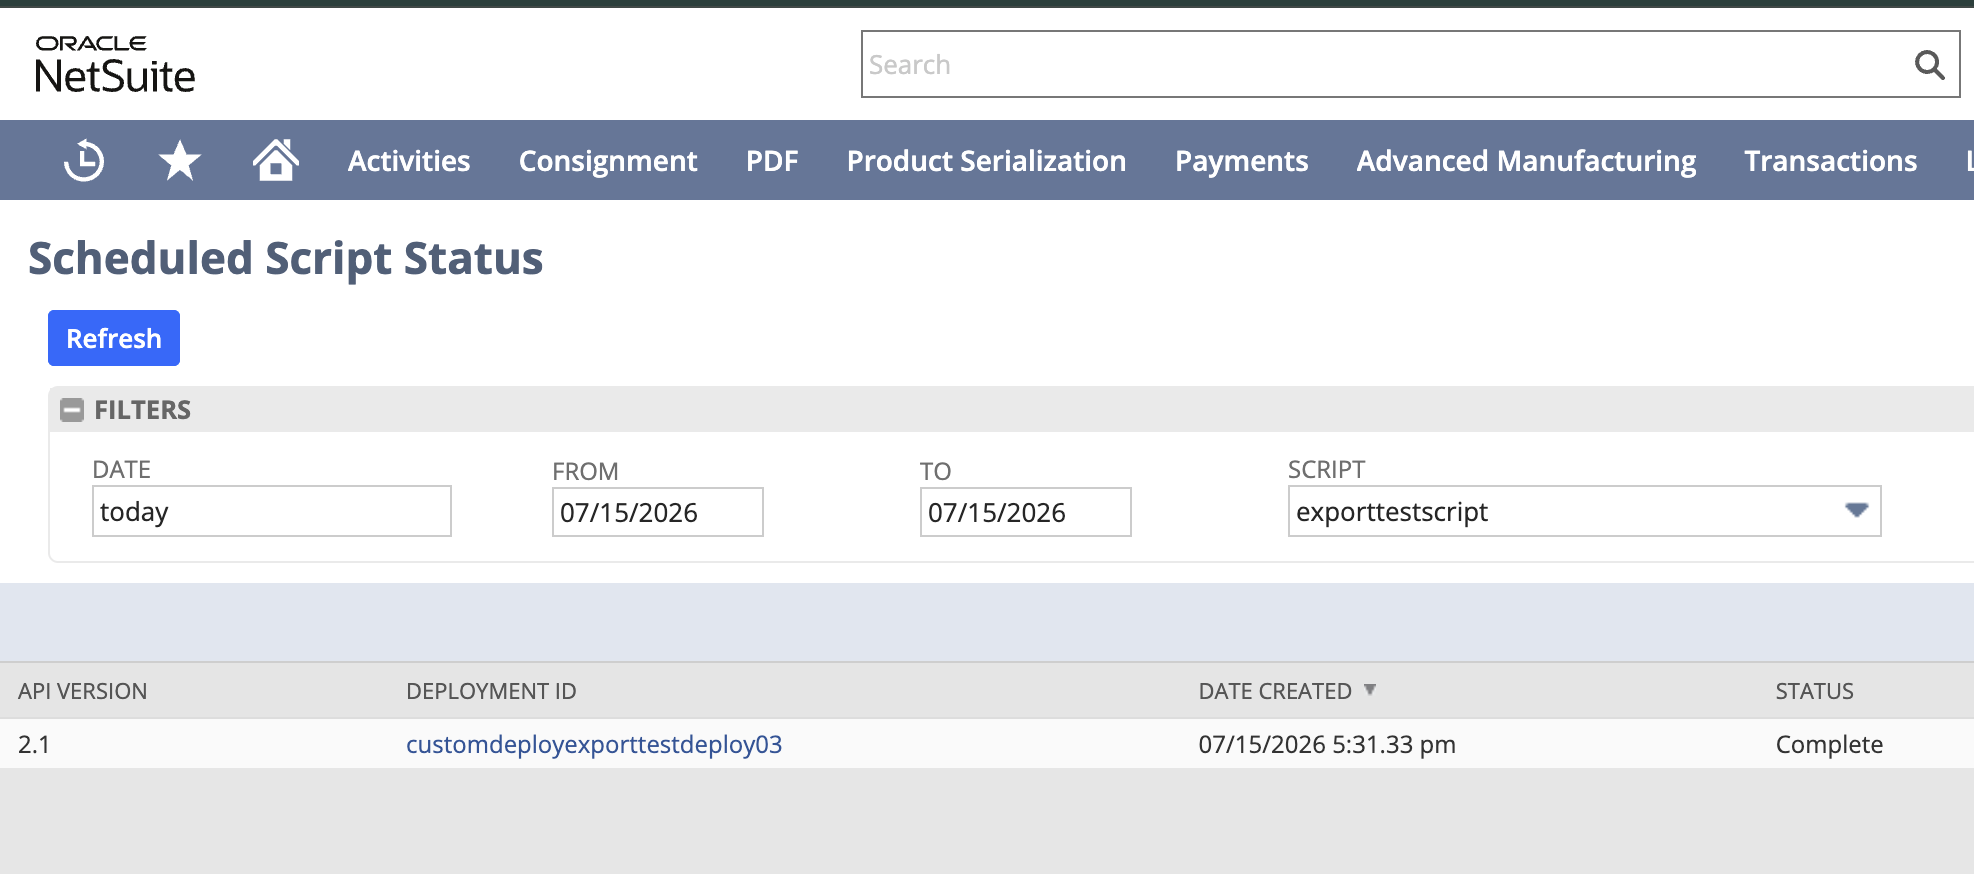 Each individual deployment also includes its own log that you can check.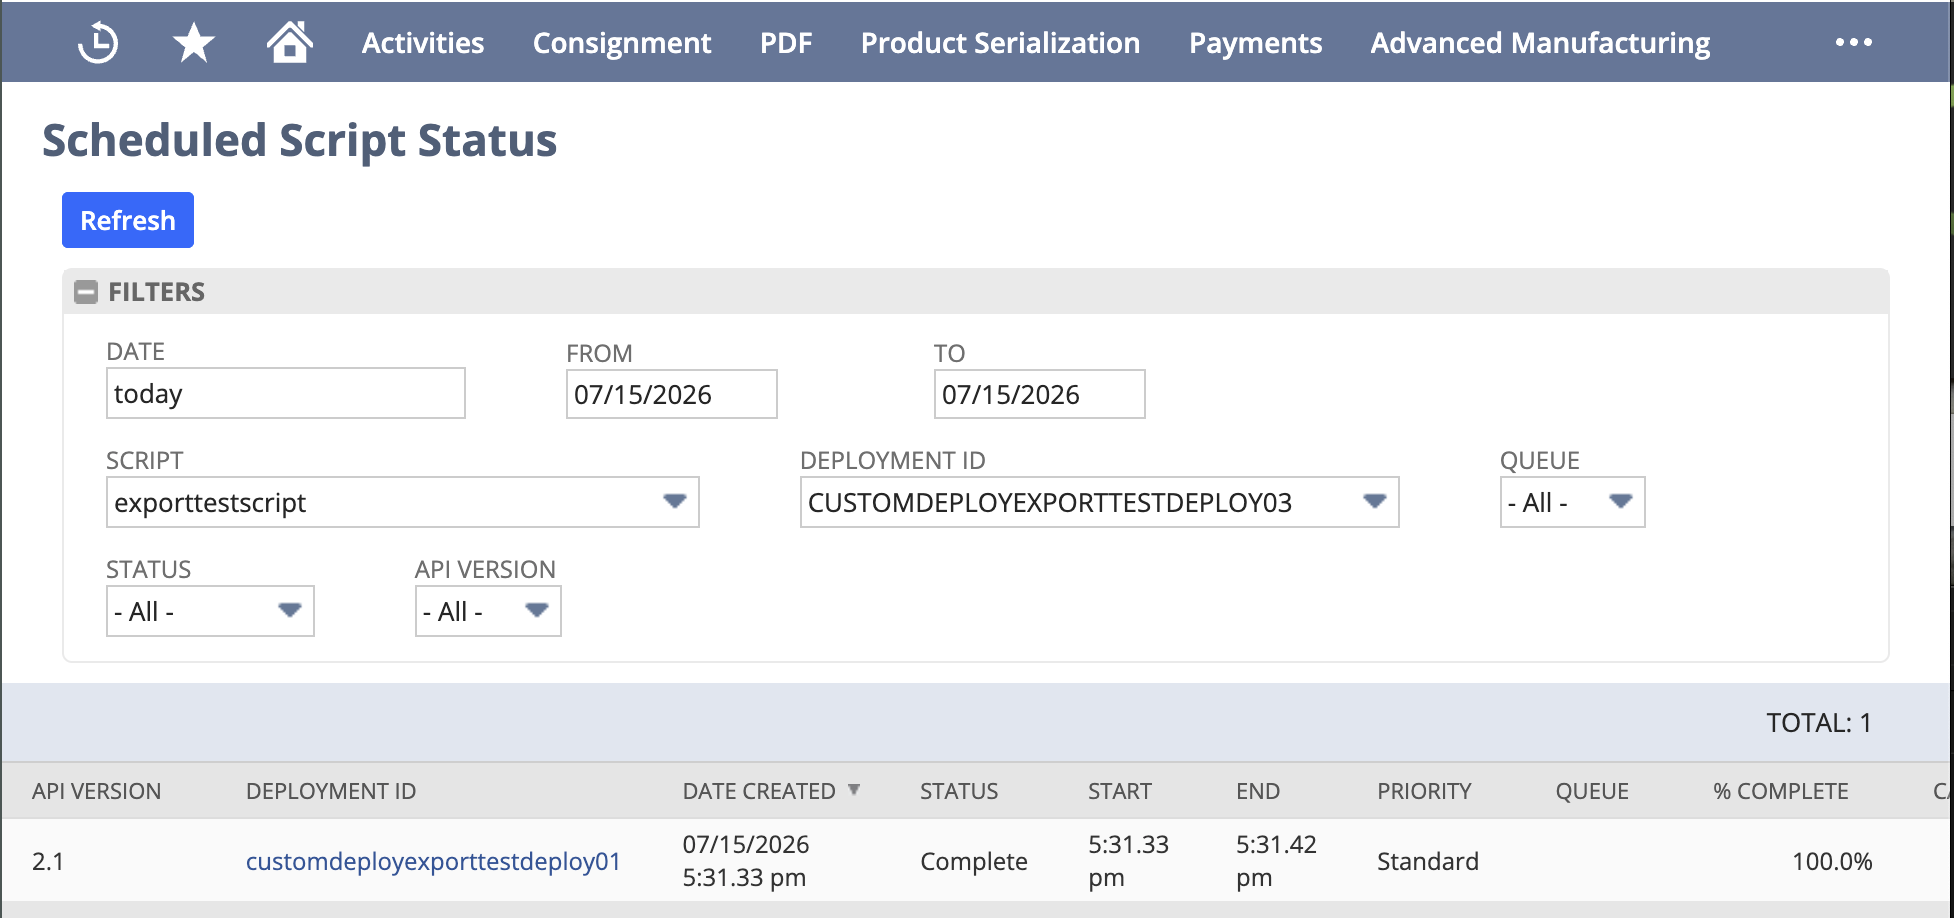
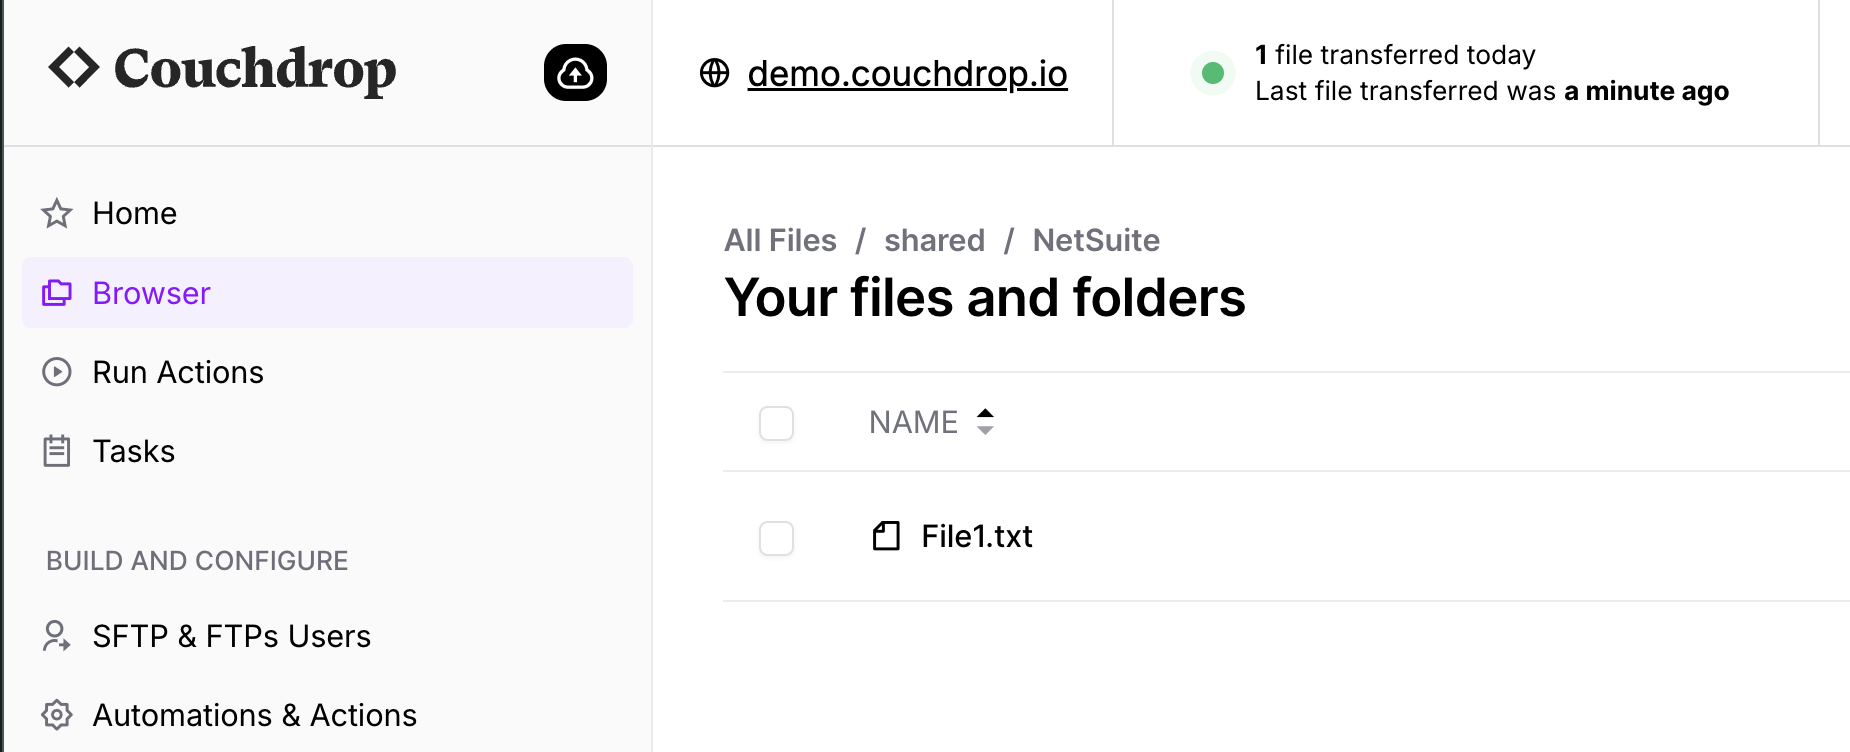
- If the status is "Complete", check that the file arrived successfully at the SFTP endpoint.
Next Steps - Adjusting scheduling and files to export
In this guide, you learned how to export files from NetSuite via SFTP. You configured the N/sftp and N/file modules with JavaScript files. To meet NetSuite's authentication requirements, you generated a Password GUID using a credentials Suitelet and added the token to the script. Finally, you deployed and executed your script to export a file via SFTP.
This process walked you through how to configure NetSuite to export a single, known file via SFTP. The method was simply to explain the process, as it is not applicable to most real-world scenarios.
After the initial setup, configuring exports for production workflows is much more straightforward. Your script can be scheduled to run using NetSuite's built-in scheduling tools. You can use N/file to loop through every file and subfolder in a directory, collect the necessary information such as the internal ID, and export each individual file. You can transform NetSuite records into File Cabinet files and export the data as a CSV.
Adjust the script to meet your needs and you can automate file exports from NetSuite via SFTP.
Couchdrop - the simple way to exchange NetSuite data
Alternatively, you can use Couchdrop's NetSuite connector to directly integrate NetSuite APIs. Using the connector, you can automate transforming records into files, turn files into API-ready data, and automate data flows between NetSuite and external partners and platforms.
This is ideal when the data you need to send is not already packaged as a file in File Cabinet. Using Couchdrop, you can bypass the steps in this guide by accessing the records directly via API. If you need the data as files, Couchdrop can also do that through its visual automation builder, including securely transferring the files it creates to external parties.
For instance, you can also export NetSuite objects such as Saved Search results, item records, invoices, inventory records, and custom files. These records can be transformed into a file, such as a CSV, and exported via SFTP. This is particularly useful for sending data to external parties, especially when they don't use NetSuite, and is a common use case of how NetSuite is used with Couchdrop.
Couchdrop also works as a cloud SFTP endpoint. While with this method you will still need to configure the data to export from within NetSuite using a process such as the one in this guide, Couchdrop enables any cloud storage to function as the endpoint, allowing you to send files from NetSuite to SharePoint, S3, Azure Blob, or any other platform.
You can try Couchdrop free for 14-days with an instant access free trial, or get in touch with our team directly to discuss your requirements by booking a demo now.